

Stephen King Books in Order (1974–2026) | Complete List & Reading Order
Stephen King Books in Order (Updated March 2026)
This page is a complete, chronological list of Stephen King books in order, including novels, novellas, short story collections, nonfiction, and major collaborations updated up to March 2026.
I keep this list updated myself every time a new book drops. Whether you’re starting from the beginning with Carrie or just tracking the latest release, you’ve found the ultimate Stephen King reading order.
Stephen King Books in Order: Quick Answers
- First Stephen King book: Carrie (1974)
- Most recent Stephen King book: Other Worlds than These (2026)
- Special release: Hansel and Gretel (2025, illustrated picture book)
- Total books published: 70+ novels and hundreds of short stories
- Best book to start with: Carrie, Misery, or Different Seasons (depending on taste)
Who Is Stephen King?
Stephen King is one of the most prolific and influential authors of our time, with over 70 novels, 200 short stories, and several works under his Richard Bachman pen name. His books span horror, supernatural fiction, suspense, and even crime and fantasy. Many have been adapted into films and TV series, making him a cornerstone of modern pop culture.
What’s Included in This Stephen King Books in Order List
This list includes:
- All published novels
- All novellas (including those inside collections)
- Short story collections
- Nonfiction books
- Major series and collaborations
- Books written as Richard Bachman
STEPHEN KING BOOKS IN ORDER FROM 1974 – 1980
This is Stephen King’s explosive debut era, where he established himself as a major voice in horror. These early books introduce his core themes: fear, power, isolation, and small-town darkness-and include some of his most iconic titles.
- Carrie (Novel: 1974)
- ‘Salem’s Lot (Novel: 1975)
- Rage (Bachman Novel: 1976)
- The Shining (Novel: 1977)
- Night Shift (Story Collection: 1977)
- The Stand (Novel: 1978)
- The Long Walk (Bachman Novel: 1978)
- The Dead Zone (Novel: 1979)
- Firestarter (Novel: 1979)
- The Mist (Novella: 1980)
- Danse Macabre (Nonfiction: 1980)
- Roadwork (Bachman Novel: 1980)
STEPHEN KING BOOKS IN ORDER FROM 1981 – 1990
The 1980s mark Stephen King’s most prolific and experimental period, including several novels written under the Richard Bachman name. This decade blends peak horror, psychological intensity, and the expansion of The Dark Tower universe.
- Cujo (Novel: 1981)
- The Dark Tower (Novel: 1981)
- The Running Man (Bachman Novel: 1981)
- Apt Pupil (Novella: 1982)
- The Body (Novella: 1982)
- The Breathing Method (Novella: 1982)
- Rita Hayworth and Shawshank Redemption (Novella: 1982)
- Different Seasons (Story Collection: 1982)
- The Plant [Installment One] (Epistolary Novel: 1982)
- Christine (Novel: 1982)
- Cycle of the Werewolf (Novel: 1982)
- The Plant [Installment Two] (Epistolary Novel: 1982)
- Pet Sematary (Novel: 1983)
- The Talisman (Novel: 1983)
- The Eyes of the Dragon (Novel: 1984 – Philtrum Press edition)
- Thinner (Bachman Novel: 1984)
- The Plant [Installment Three] (Epistolary Novel: 1984)
- Skeleton Crew (Story Collection: 1984)
- Cycle of the Werewolf (Novel: 1985)
- IT (Novel; September 1986)
- The Dark Tower: The Drawing of the Three (Novel: 1986)
- The Eyes of the Dragon (Novel: 1987 – Viking edition)
- Misery (Novel: 1987)
- The Tommyknockers (Novel: 1987)
- My Pretty Pony (Novel: 1987)
- Nightmares in the Sky (Nonfiction: 1987)
- Letters from Hell (Novel: 1988)
- Dolan’s Cadillac (Novel: 1988)
- The Dark Half (Novel: 1989)
- The Stand: The Complete and Uncut Edition (Novel: 1989)
- The Langoliers (Novella: 1990)
- The Library Policeman (Novella: 1990)
- Secret Window, Secret Garden (Novella: 1990)
- The Sun Dog (Novella: 1990)
- Four Past Midnight (Story Collection: 1990)
- The Dark Tower: The Waste Lands (Novel: 1990)
STEPHEN KING BOOKS IN ORDER FROM 1991 – 2000
During the 1990s, King’s work becomes more reflective and character-driven, often grappling with trauma, morality, and redemption. This era also includes deeply emotional stories and some of his most beloved adaptations.
- Needful Things (Novel; October 1991)
- Gerald’s Game (Novel; May 1992)
- Nightmares & Dreamscapes (Story Collection: 1993)
- Dolores Claiborne (Novel: 1993)
- Mid-Life Confidential: The Rock Bottom Remainders Tour America With Three Chords and an Attitude (Nonfiction: 1993)
- Insomnia (Novel: 1994)
- Blind Willie (Novella: 1994)
- Rose Madder (Novel: 1994)
- Desperation (Novel: 1995)
- The Regulators (Bachman Novel: 1995)
- The Green Mile: The Two Dead Girls (Novel: 1996)
- The Green Mile: The Mouse on the Mile (Novel: 1996)
- The Green Mile: Coffey’s Hands (Novel: 1996)
- The Green Mile: The Bad Death of Eduard Delacroix (Novel: 1996)
- The Green Mile: Night Journey (Novel: 1996)
- The Green Mile: Coffey on the Mile (Novel: 1996)
- The Dark Tower: Wizard and Glass (Novel: 1996)
- Six Stories (Novel: 1996)
- Bag of Bones (Novel: 1998)
- The Girl Who Loved Tom Gordon (Novel: 1999)
- The New Lieutenant’s Rap (Novel: 1999)
- Hearts in Atlantis (Novella: 1999)
- Heavenly Shades of Night Are Falling (Novella: 1999)
- Low Men in Yellow Coats (Novella: 1999)
- Why We’re in Vietnam (Novella: 1999)
- Hearts in Atlantis (Story Collection: 1999)
- On Writing: A Memoir of the Craft (Nonfiction: 1999)
- Secret Windows: Essays and Fiction on the Craft of Writing (Nonfiction: 1999)
- The Green Mile: The Complete Serial Novel (Novel: 2000)
STEPHEN KING BOOKS IN ORDER FROM 2001 – 2010
During the 1990s, King’s work becomes more reflective and character-driven, often grappling with trauma, morality, and redemption. This era also includes deeply emotional stories and some of his most beloved adaptations.
- Dreamcatcher (Novel: 2001)
- Black House (Novel: 2001)
- From a Buick 8 (Novel: 2001)
- Everything’s Eventual (Story Collection: 2002)
- The Dark Tower: Wolves of the Calla (Novel: 2002)
- The Dark Tower: The Gunslinger (Revised Novel: 2003)
- The Dark Tower: Song of Susannah (Novel: 2003)
- The Dark Tower (Novel: 2004)
- Faithful (Nonfiction: 2005)
- The Colorado Kid (Novel: 2005)
- The Secretary of Dreams, Vol. 1 (Novel: 2005)
- Cell (Novel: 2006)
- Lisey’s Story (Novel: 2006)
- Blaze (Bachman Novel: 2006)
- The Colorado Kid (Chadbourne) (Novel: 2006)
- The Colorado Kid (Miller) (Novel: 2006)
- The Colorado Kid (Potter) (Novel: 2006)
- Duma Key (Novel: 2008)
- A Very Tight Place (Novella: 2008)
- N (Novella: 2008)
- Just After Sunset (Story Collection: 2008)
- The Little Sisters of Eluria (Novel: 2009)
- Stephen King Goes to the Movies (Story Collection: 2009)
- UR (Novella: 2009)
- Under the Dome (Novel: 2009)
- Blockade Billy (Novella: 2009)
- The Secretary of Dreams, Vol. 2 (Novel: 2010)
- Full Dark, No Stars (Story Collection: 2010)
STEPHEN KING BOOKS IN ORDER FROM 2011 – 2020
The 2010s highlight King’s late-career evolution, with a strong focus on crime fiction, aging, and legacy. Many of these books feel more grounded and humane, blending suspense with emotional depth.
- 11/22/63 (Novel: 2011)
- The Dark Tower: The Wind Through the Keyhole (Novel: 2012)
- GUNS (Nonfiction: 2013)
- Joyland (Novel: 2013)
- The Dark Man (Novel: 2013)
- Doctor Sleep (Novel: 2013)
- Mr. Mercedes (Novel: 2014)
- Revival (Novel: 2014)
- Finders Keepers (Novel: 2015)
- The Bazaar of Bad Dreams (Story Collection: 2015)
- End of Watch (Novel: 2016)
- Gwendy’s Button Box (Novella: 2017)
- Sleeping Beauties (Novel: 2017)
- The Outsider (Novel: 2018)
- Elevation (Novella: 2018)
- The Institute (Novel: 2019)
- If It Bleeds (Novella: 2020)
- The Life of Chuck (Novella: 2020)
- Mr. Harrigan’s Phone (Novella: 2020)
- Rat (Novella: 2020)
STEPHEN KING BOOKS IN ORDER FROM 2021 – 2026
Five decades into his career, Stephen King continues to innovate. His recent bibliography showcases a seasoned author still eager to experiment with genre and character, seamlessly marrying classic themes with contemporary ideas.
- Later (Novella: 2021)
- Billy Summers (Novel: 2021)
- Gwendy’s Final Task (Novel: 2022)
- Fairy Tale (Novel: 2022)
- Holly (Novel: 2023)
- You Like It Darker (Story Collection: 2024)
- Never Flinch — (2025, Novel)
- Hansel and Gretel — (2025, Picture Book)
- Other Worlds than These (Novel: 2026)
By Series Order
The Dark Tower
- The Gunslinger
- The Drawing of the Three
- The Waste Lands
- Wizard and Glass
- The Wind Through the Keyhole
- Wolves of the Calla
- Song of Susannah
- The Dark Tower
Bill Hodges Trilogy
- Mr. Mercedes
- Finders Keepers
- End of Watch
Holly Gibney Books
- The Outsider
- “If It Bleeds” (novella in If It Bleeds)
- Holly
- Never Flinch
Highly recommend you read The Bill Hodges Trilogy before the Holly Gibney books.
Gwendy (with Richard Chizmar)
- Gwendy’s Button Box
- Gwendy’s Magic Feather (Chizmar solo)
- Gwendy’s Final Task
The Talisman Cycle (with Peter Straub)
- The Talisman
- Black House
- Other Worlds than These
Where to Start With Stephen King (Based on What You Like)
If you’re new to Stephen King, don’t start with the longest book on the shelf. Start with what matches your reading taste:
- Classic horror: ’Salem’s Lot
- Psychological suspense: Misery
- Short but powerful: Different Seasons
- Emotional & humane: The Green Mile
- Modern crime thrillers: Mr. Mercedes
These are the books I recommend most often because they’re representative of his style, emotionally gripping, and less intimidating than It or The Stand.
Collections & Nonfiction
Short Story Collections:
- Night Shift (1978)
- Different Seasons (1982)
- Skeleton Crew (1985)
- Four Past Midnight (1990)
- Nightmares & Dreamscapes (1993)
- Everything’s Eventual (2002)
- Just After Sunset (2008)
- Full Dark, No Stars (2010)
- The Bazaar of Bad Dreams (2015)
- If It Bleeds (2020)
- You Like It Darker (2024)
Nonfiction:
- Danse Macabre (1981)
- On Writing: A Memoir of the Craft (2000)
- Faithful (2004, with Stewart O’Nan)
Do You Need to Read Stephen King Books in Order?
No, most Stephen King books are standalones. However, you should read in order for:
- The Dark Tower
- Bill Hodges Trilogy
- Holly Gibney books
- Gwendy trilogy
- The Talisman Cycle
If you read those out of order, you’re bound to hit spoilers and miss out on some cool character crossovers.
Source: Wikipedia
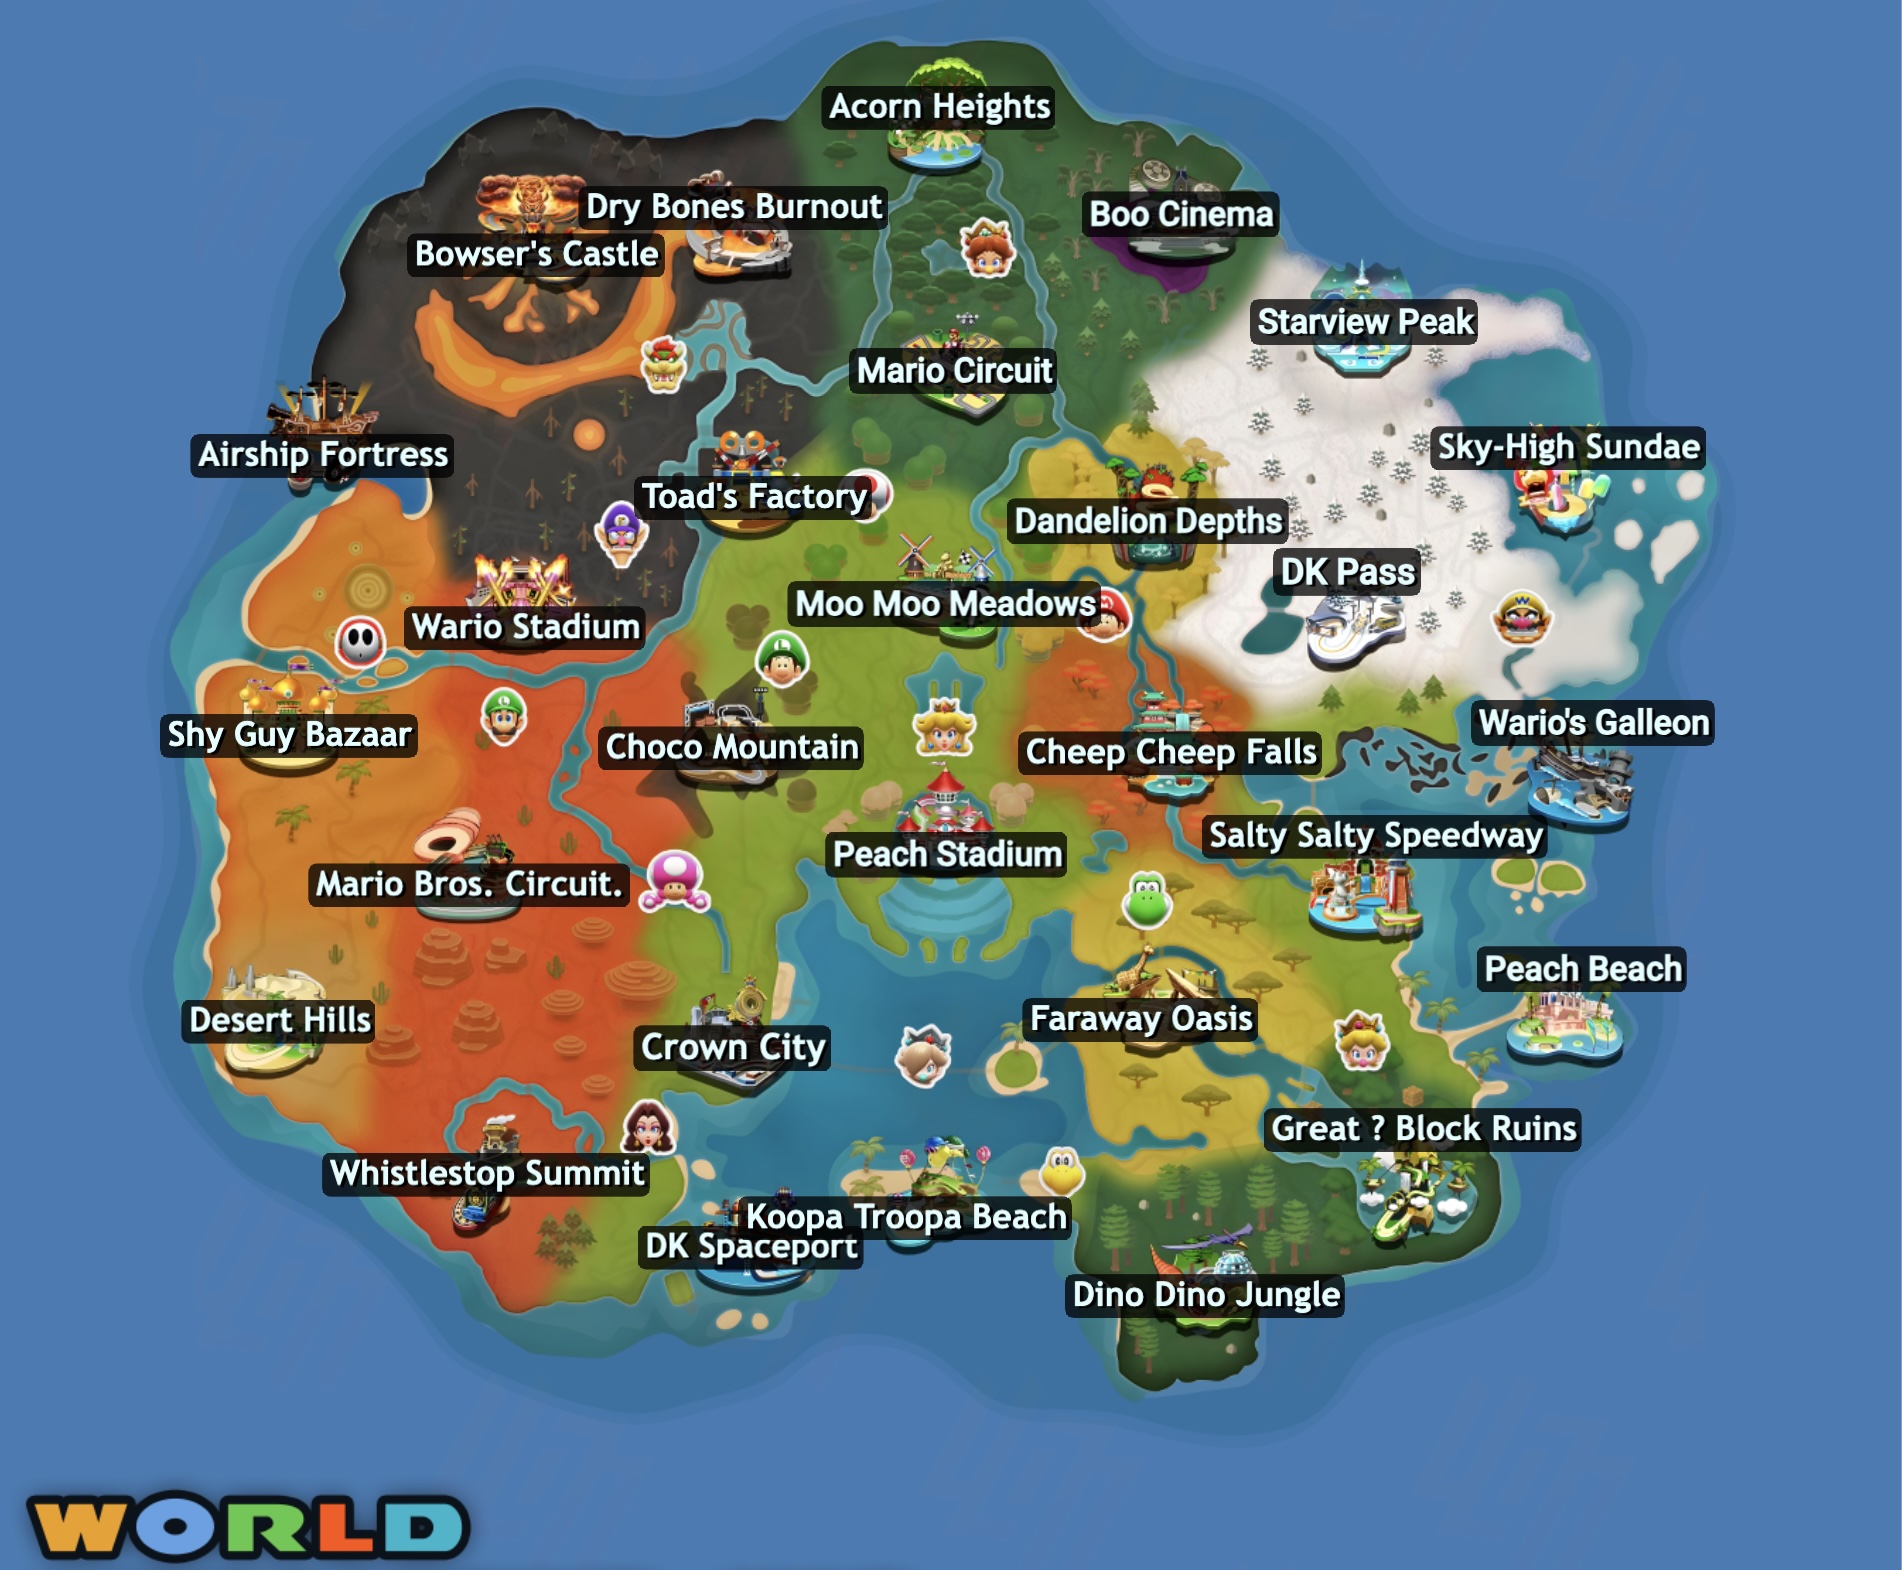
Mario Kart World – Every Costume in the game

Locations
Mario Costumes
As you’d expect, the star of the show has a huge wardrobe selection. In addition to Mario’s default outfit, he gets nine unique fits ready for the race course.
| Outfit | Name | Unlock food (Location) |
|---|---|---|
 |
Touring | Burger (Mario Bros. Circuit) Milk, Yoghurt (Moo Moo Meadows) |
 |
Pro Racer | Cakes, Pancakes (Crown City, Peach Stadium) |
 |
Mechanic | Apple Juice (Toad’s Factory) |
 |
Dune Rider | Pokey Curry (Choco Mountain) |
 |
Cowboy | Spicy Chips, Canned Coffee (Whistlestop Summit, Toad’s Factory) |
 |
Sightseeing | Pizza (Koopa Troopa Beach, Crown City, Salty Salty Speedway) |
 |
Aviator | Spicy Meat (Dino Dino Jungle, Choco Mountain, Wario Stadium) |
 |
Happi | Takoyaki, Taiyaki (Cheep Cheep Falls)Sushi (Cheep Cheep Falls, Koopa Troopa Beach) |
 |
All-Terrain | Donuts (Mario Circuit. Peach Stadium) |
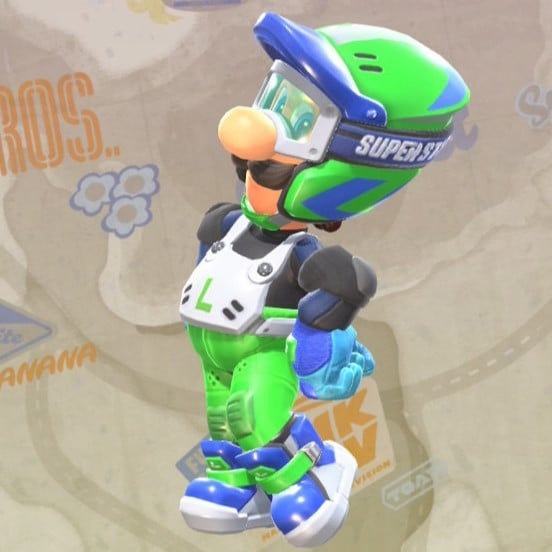
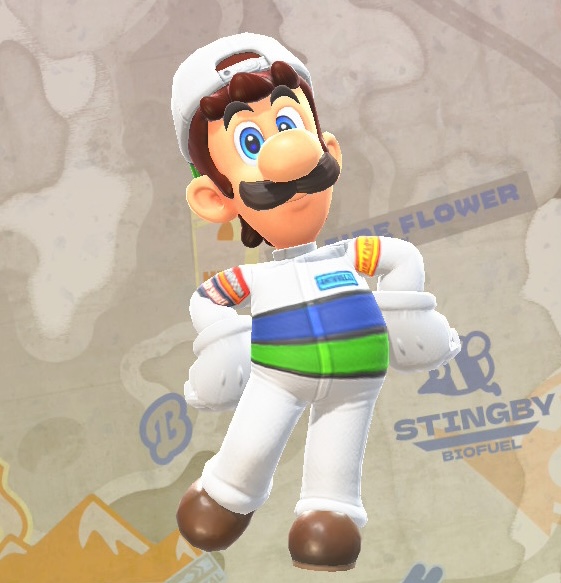
Luigi Costumes
The Lean Mean Green Machine is always just slightly behind his brother, and that’s true in the costume department too. Luigi has eight alternate costumes, along with his default green dungaree-d duds.
| Outfit | Name | Unlock food (Location) |
|---|---|---|
 |
Touring | Burger (Mario Bros. Circuit) Spicy Meat (Dino Dino Jungle, Choco Mountain, Wario Stadium) |
 |
Pro Racer | Cake (Crown City, Peach Stadium) |
 |
Oasis | Naan Bread (Shy Guy Bazaar, Desert Hills) |
 |
Farmer | Milk, Yoghurt (Moo Moo Meadows) |
 |
Happi | Takoyaki, Taiyaki (Cheep Cheep Falls)Sushi (Cheep Cheep Falls, Koopa Troopa Beach) |
 |
All-Terrain | Donuts (Mario Circuit. Peach Stadium) |
 |
Gondolier | Pizza (Koopa Troopa Beach, Crown City, Salty Salty Speedway) Fruit Bowl (DK Spaceport) |
 |
Mechanic | Soda (Mario Circuit) |
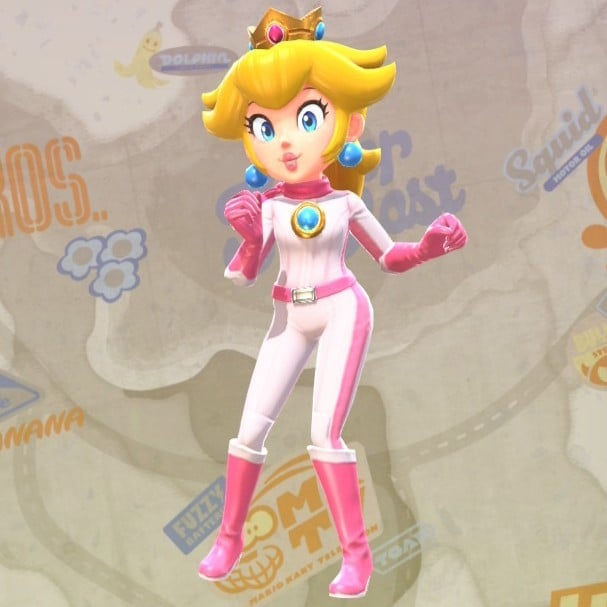
Peach Costumes
Princess Peach has some fabulous outfits to pick up, and she’s clearly loving every single one of them. While she starts in her signature pink dress, she has eight costumes to unlock in Mario Kart World.
| Outfit | Name | Unlock food (Location) |
|---|---|---|
 |
Touring | Chocolate (Crown City) |
 |
Pro Racer | Afternoon Tea (Crown City, Peach Stadium) |
 |
Farmer | Milk, Yoghurt (Moo Moo Meadows) |
 |
Sightseeing | Pizza (Koopa Troopa Beach, Crown City, Salty Salty Speedway) Fruit Bowl (DK Spaceport) |
 |
Aviator | Spicy Meat (Dino Dino Jungle, Choco Mountain, Wario Stadium) |
 |
Yukata | Takoyaki, Taiyaki (Cheep Cheep Falls)Sushi (Cheep Cheep Falls, Koopa Troopa Beach) |
 |
Aero | Donuts (Mario Circuit. Peach Stadium) |
 |
Vacation | Fried Fish (Crown City, Koopa Troopa Beach) Popcorn (Boo Cinema) |
Daisy Costumes
Princess Daisy brings her sense style to the course with aplomb. Unlike her pink counterpart, Daisy only gets six alternate costumes, but they’re all fantastic.
| Outfit | Name | Unlock food (Location) |
|---|---|---|
 |
Touring | Burger (Mario Bros. Circuit) Milk, Yoghurt (Moo Moo Meadows) |
 |
Pro Racer | Afternoon Tea (Crown City, Peach Stadium) |
 |
Oasis | Popcorn (Boo Cinema) |
 |
Swimwear | Takoyaki, Taiyaki (Cheep Cheep Falls)Sushi (Cheep Cheep Falls, Koopa Troopa Beach) |
 |
Aero | Donuts (Mario Circuit, Peach Stadium) |
 |
Vacation | Spicy Chips, Canned Coffee (Whistlestop Summit, Toad’s Factory) Fried Fish (Crown City, Koopa Troopa Beach) |
Yoshi Costumes
Yoshi comes in all sorts of colours, and while we’re all very familiar with the Green version — the default — there are plenty of others. Mario Kart World gives us eight different coloured Yoshi, each with a different outfit, too.
| Outfit | Name | Unlock food (Location) |
|---|---|---|
 |
Touring | Burger (Whistletop Summit) Milk, Yoghurt (Moo Moo Meadows) |
 |
Pro Racer | Cake (Crown City, Peach Stadium) Soda (Toad’s Factory) |
 |
Aristocrat | Popcorn (Boo Cinema) |
 |
Soft Server | Ice Cream (Sky-High Sundae) |
 |
Biker | Spicy Meat, Curry (Wario Stadium) |
 |
Swimwear | DK Drink (DK Spaceport, Koopa Troopa Beach) Fruit Bowl (DK Spaceport) |
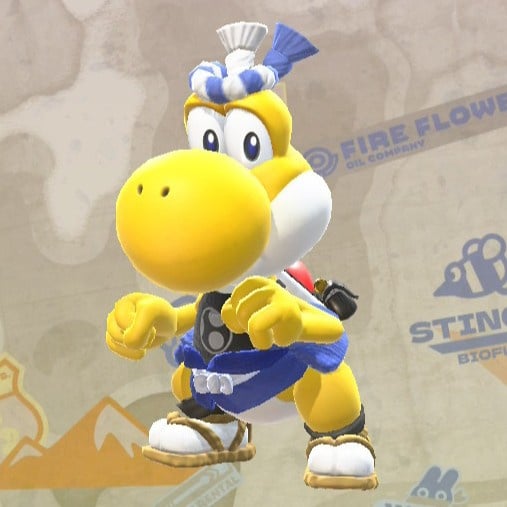 |
Matsuri | Takoyaki, Taiyaki (Cheep Cheep Falls)Sushi (Cheep Cheep Falls, Koopa Troopa Beach) |
 |
Food Slinger | Pizza (Koopa Troopa Beach, Crown City, Salty Salty Speedway) |
Donkey Kong Costumes
Donkey Kong’s new design is all the rage right now… but that doesn’t mean Nintendo had to shaft him. DK only has one other costume, and he deserved way, way more.
| Outfit | Name | Unlock food (Location) |
|---|---|---|
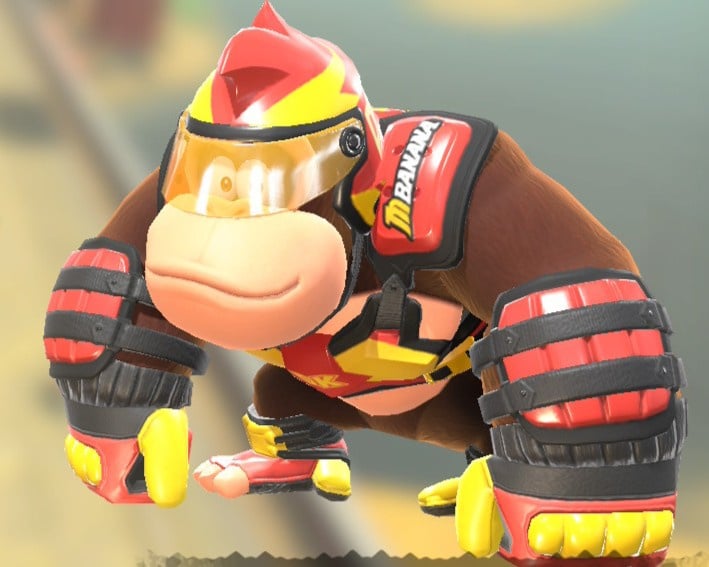 |
All-Terrain | Burger (Mario Bros. Circuit) Donuts (Mario Circuit. Peach Stadium)Ice Cream (Sky-High Sundae)(Basically everything) |
Bowser Costumes
Bowser’s outfit count might not rival his nemesis’, but at a cool four alternate outfits, there’s more than just a shell to Mushroom Kingdom’s big bad.
| Outfit | Name | Unlock food (Location) |
|---|---|---|
 |
Pro Racer | Cake (Crown City, Peach Stadium) |
 |
Biker | Burger (Mario Bros. Circuit) Pizza (Koopa Troopa Beach, Crown City, Salty Salty Speedway) Afternoon Tea (Crown City, Peach Stadium) |
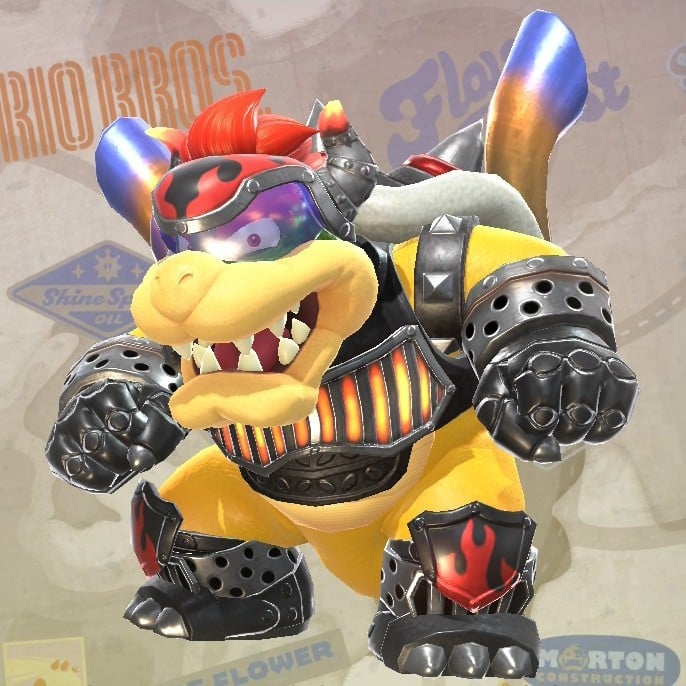 |
Supercharged | Spicy Chips, Canned Coffee (Whistlestop Summit, Toad’s Factory) |
 |
All-Terrain | Fruit Bowl (DK Spaceport) |
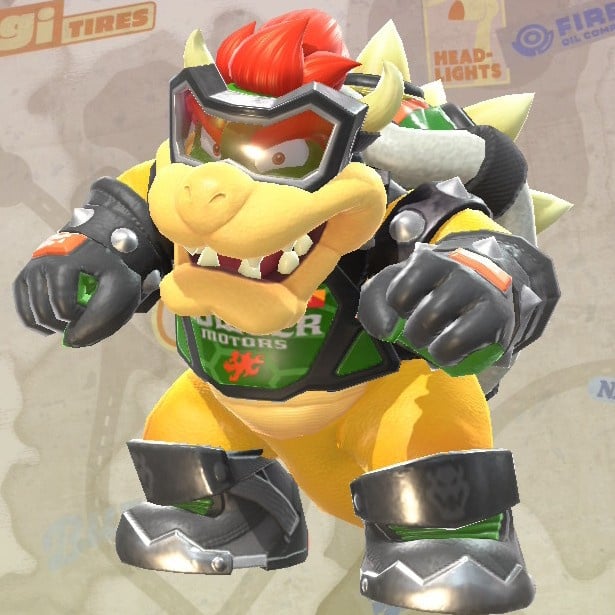
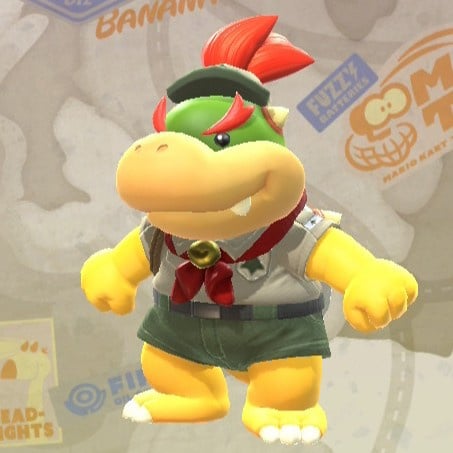
Bowser Jr. Costumes
Bowser Jr. is along for the ride and is taking a leaf out of his dad’s book for some of his outfits. The little scarf-wearing menace has three alternate costumes to go along with his iconic cloth-wear.
| Outfit | Name | Unlock food (Location) |
|---|---|---|
 |
Pro Racer | Pizza (Koopa Troopa Beach, Crown City, Salty Salty Speedway) |
 |
Biker Jr. | Afternoon Tea (Crown City, Peach Stadium) |
 |
Explorer | DK Drink (DK Spaceport, Koopa Troopa Beach) Fruit Bowl (DK Spaceport) |
Koopa Troopa Costumes
Koopa Troopa, usually working under Bowser, has been taking some of the spotlight in some of the sports and spin-off games over the last few decades. And as a result, he’s got a solid five alternate costumes to enjoy.
| Outfit | Name | Unlock food (Location) |
|---|---|---|
 |
Runner | Burger (Mario Bros. Circuit) |
 |
Pro Racer | Afternoon Tea, Cake (Crown City, Peach Stadium) |
 |
All-Terrain | Naan Bread (Shy Guy Bazaar, Desert Hills) Spicy Meat (Dino Dino Jungle, Choco Mountain, Wario Stadium) Bread Basket (Airship Fortress, DK Pass)Donuts (Mario Circuit. Peach Stadium) |
 |
Sailor | Popcorn (Boo Cinema) |
 |
Work Crew | Spicy Chips, Canned Coffee (Whistlestop Summit, Toad’s Factory) |
Toad Costumes
Toad has been a Mario Kart mainstay since the very beginning — but why does he only have four alternate outfits? We’re not sure! At least there’s some Treasure Tracker inspiration, here…
| Outfit | Name | Unlock food (Location) |
|---|---|---|
 |
Pro Racer | Spicy Meat (Dino Dino Jungle, Choco Mountain, Wario Stadium) |
 |
Engineer | Spicy Chips, Canned Coffee (Whistlestop Summit, Toad’s Factory) |
 |
Burger Bud | Burger (Mario Bros. Circuit) |
 |
Explorer | Naan Bread (Shy Guy Bazaar, Desert Hills) |
Toadette Costumes
Toadette actually made her debut in a Mario Kart game (Double Dash), and she’s been in most entries ever since. Like Toad, she has four alternate costumes. We’re kind of in love with that Soft Server one…
| Outfit | Name | Unlock food (Location) |
|---|---|---|
 |
Pro Racer | Chocolate Bar (Crown City) |
 |
Conductor | Spicy Chips, Canned Coffee (Whistlestop Summit, Toad’s Factory) |
 |
Soft Server | Pizza (Koopa Troopa Beach, Crown City, Salty Salty Speedway)Ice Cream (Sky-High Sundae) |
 |
Explorer | Pancakes (Crown City, Peach Stadium) |
Lakitu Costumes
So… who is picking up people who drive off the course? We’re not sure either, but Lakitu has some driving skills. He’s also got two alternate outfits, one of which represents his roadside responsibilities.
| Outfit | Name | Unlock food (Location) |
|---|---|---|
 |
Pit Crew | Burger (Mario Bros. Circuit) Cake (Crown City, Peach Stadium) |
 |
Fisherman | Takoyaki, Taiyaki (Cheep Cheep Falls)Sushi (Cheep Cheep Falls, Koopa Troopa Beach) |
King Boo Costumes
King Boo is a frequent Mario Kart guest nowadays, and he also gets some of our favourite costumes. Even with three alternate outfits, he doesn’t ever leave his crown behind.
| Outfit | Name | Unlock food (Location) |
|---|---|---|
 |
Pro Racer | Soda (Toad’s Factory) Curry Bowl (Bowser’s Castle) |
 |
Aristocrat | Pizza (Koopa Troopa Beach, Crown City, Salty Salty Speedway) Popcorn (Boo Cinema) |
 |
Pirate | Skewers (Wario’s Shipyard, Peach Beach, Whistlestop Summit, Shy Guy Bazaar) |
Shy Guy Costumes
Unlike their colourful dinosaur friend (enemy?), Shy Guy has a much more limited variety of outfits, with only two additional ones. One of them is one of our absolute favourites, though, so we might let this slide…
| Outfit | Name | Unlock food (Location) |
|---|---|---|
 |
Pit Crew | Burger (Mario Bros. Circuit) |
 |
Slope Styler | Ice Cream (Sky-High Sundae) Bread Basket (Airship Fortress, DK Pass) |
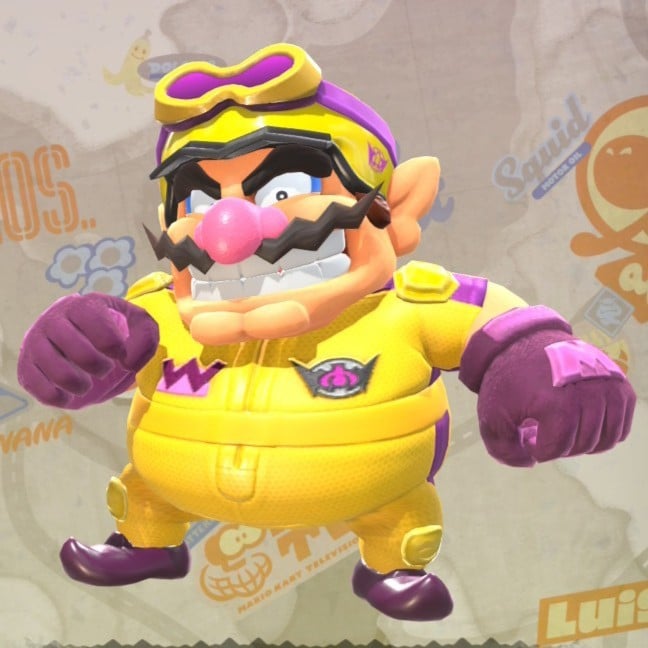
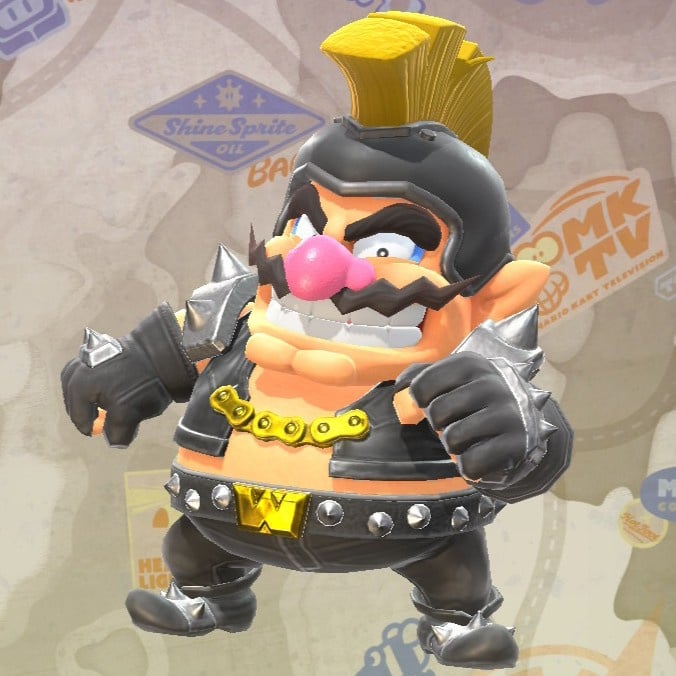
Wario Costumes
Wario’s rise in popularity over the years is clearly reflected in his large, eclectic wardrobe. He has seven excellent costumes to go with his iconic dungaree combo, with a couple that’ll make you laugh out loud.
| Outfit | Name | Unlock food (Location) |
|---|---|---|
 |
Pro Racer | Donuts (Mario Circuit, Peach Stadium) |
 |
Oasis | Popcorn (Boo Cinema) |
 |
Wicked Wasp | Pancakes (Peach Stadium, Acorn Heights) Ice Cream (Sky-High Sundae) |
 |
Biker | Burger (Mario Bros. Circuit) |
 |
Pirate | Skewers (Wario’s Shipyard, Peach Beach, Whistlestop Summit, Shy Guy Bazaar) |
 |
Road Ruffian | DK Drink (DK Spaceport, Koopa Troopa Beach) Fruit Bowl (DK Spaceport) |
 |
Work Crew | Takoyaki, Taiyaki (Cheep Cheep Falls)Sushi (Cheep Cheep Falls, Koopa Troopa Beach) |
Waluigi Costumes
While he can’t manage as many outfits as his partner in crime, Waluigi has some of the game’s very best — we’ve all seen the Wampire, right? Five costumes is nothing to sneeze at, especially when you see the selection.
| Outfit | Name | Unlock food (Location) |
|---|---|---|
 |
Pro Racer | Burger (Mario Bros. Circuit) Cake, Pancakes (Peach Stadium, Acorn Heights) |
 |
Wampire | Popcorn (Boo Cinema) |
 |
Mariachi | Chips, Apple Juice (Dry Bones Burnout) |
 |
Biker | Burger (Mario Bros. Circuit) |
 |
Road Ruffian | Skewers (Wario’s Shipyard, Peach Beach, Whistlestop Summit) DK Drink (DK Spaceport, Koopa Troopa Beach) Fruit Bowl (DK Spaceport) |
Birdo Costumes
Birdo’s ribbon and ring are ripe for customisation, right? Well, not this time around, apparently. Birdo only has two alternate costumes, but we’re big fans of both of them. That checkerboard bow is rather lovely.
| Outfit | Name | Unlock food (Location) |
|---|---|---|
 |
Pro Racer | DK Drink (DK Spaceport, Koopa Troopa Beach) |
 |
Vacation | Takoyaki, Taiyaki (Cheep Cheep Falls)Sushi (Cheep Cheep Falls, Koopa Troopa Beach) |
Pauline Costumes
All the other girls got a lot of love in Mario Kart World, so why not Pauline? Instead, she has just one alternate costume to go with her standard red dress. We don’t think that’s fair.
| Outfit | Name | Unlock food (Location) |
|---|---|---|
 |
Aero | Burger (Mario Bros. Circuit)Donuts (Mario Circuit. Peach Stadium) Ice Cream (Sky-High Sundae)(Basically everything) |
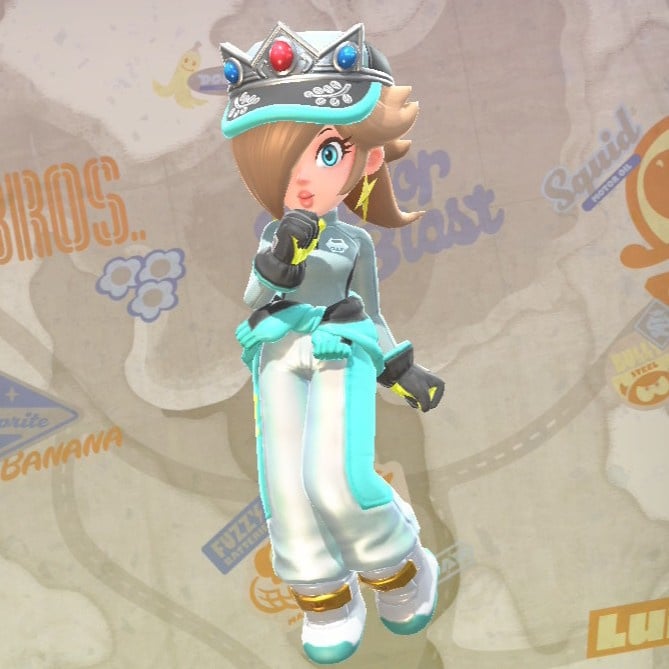
Rosalina Costumes
Rosalina is cool, calm, and collected, and that’s reflected in her wardrobe choices. She’s also kept things fairly minimal with just four additional outfits. One of them is a very beautiful dress, though.
| Outfit | Name | Unlock food (Location) |
|---|---|---|
 |
Touring | Burger (Mario Bros. Circuit) Pancakes (Crown City, Peach Stadium)Milk, Yoghurt (Moo Moo Meadows) |
 |
Pro Racer | Fruit Bowl (DK Spaceport) |
 |
Aurora | Ice Cream (Sky-High Sundae) |
 |
Aero | Donuts (Mario Circuit. Peach Stadium) |
Baby Mario Costumes
Baby Mario has inherited his older version’s builder outfit plus a couple of extra fits for the ride. He may only have three other costumes, but let’s be honest, the oversized cap is already good enough — does he need anything else?
| Outfit | Name | Unlock food (Location) |
|---|---|---|
 |
Pro Racer | Burger (Mario Bros. Circuit) |
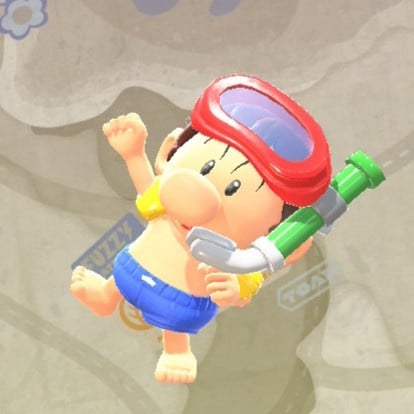 |
Swimwear | DK Drink (DK Spaceport, Koopa Troopa Beach) Fruit Bowl (DK Spaceport) Takoyaki, Taiyaki (Cheep Cheep Falls)Sushi (Cheep Cheep Falls, Koopa Troopa Beach) |
 |
Work Crew | Pancakes (Acorn Heights) |
Baby Luigi Costumes
Poor Baby Luigi. While his older version has been given a lot of love, this little guy only has two additional costumes. Don’t worry Luigi, there’s good stuff in your future…
| Outfit | Name | Unlock food (Location) |
|---|---|---|
 |
Pro Racer | Burger (Mario Bros. Circuit) |
 |
Work Crew | Cake, Pancakes (Peach Stadium, Acorn Heights) |
Baby Peach Costumes
Unlike the boys, the Baby girls have a couple of extra clothes to keep them ready for the road. Baby Peach gets four different costumes along with her default outfit, all boasting her signature colour.
| Outfit | Name | Unlock food (Location) |
|---|---|---|
 |
Touring | Popcorn (Boo Cinema) |
 |
Pro Racer | Burger (Mario Bros. Circuit) |
 |
Sailor | Skewers (Wario’s Shipyard, Peach Beach, Whistlestop Summit, Shy Guy Bazaar) |
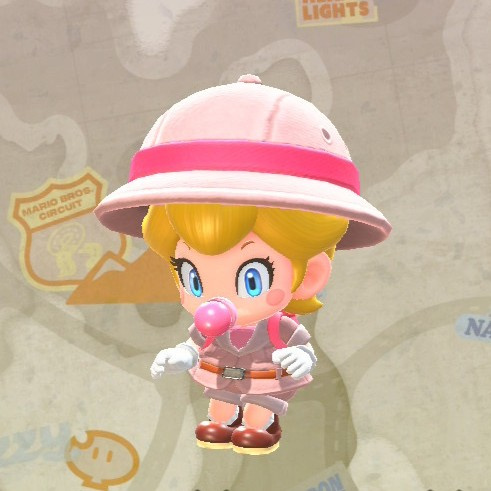 |
Explorer | Pancakes (Acorn Heights) |
Baby Daisy Costumes
Baby Daisy shows early signs of her adult’s fashion sense here with a little bit of added cuteness. Like Peach, she gets four extra outfits.
| Outfit | Name | Unlock food (Location) |
|---|---|---|
 |
Touring | Popcorn (Boo Cinema) |
 |
Pro Racer | Burger (Mario Bros. Circuit) |
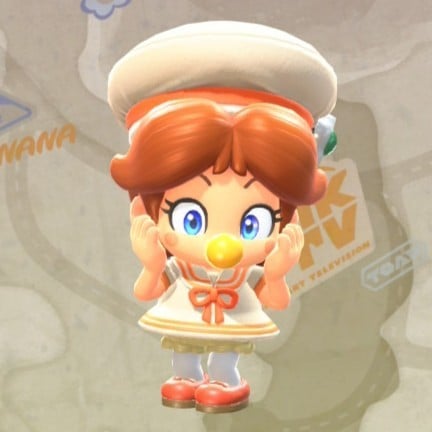 |
Sailor | Skewers (Wario’s Shipyard, Peach Beach, Whistlestop Summit, Shy Guy Bazaar) |
 |
Explorer | Pancakes (Acorn Heights) |
Baby Rosalina Costumes
The newest of the babies, Baby Rosalina has the same number of outfits as her adult counterpart, at four alternate costumes. She can float, too, because of course she can.
| Outfit | Name | Unlock food (Location) |
|---|---|---|
 |
Touring | Popcorn (Boo Cinema) |
 |
Pro Racer | Burger (Mario Bros. Circuit) |
 |
Sailor | Skewers (Wario’s Shipyard, Peach Beach, Whistlestop Summit, Shy Guy Bazaar) |
 |
Explorer | Pancakes (Acorn Heights) |
We are Star Stuff

I have been, only once, asked “why Star?”, and I went on a long explanation about that, but recently I found this tweet that prompted me to summarize it in 280 characters, and I think it deserves a spot here.
We are all star stuff. Every atom in your body came from a star that exploded. The atoms in your left hand probably came from a different star than your right hand. It really is the most poetic thing about physics: We are all stardust. 💖💖💖 https://t.co/7cogjlXjPI
— Star ⭐️✨💫💖 (@iStarStuff) September 15, 2018
So if you ever wondered the reason behind my Twitter handle, this is it.
The Full Shiny Sandwich List for Each Type in Pokemon Scarlet and Pokemon Violet
Here’s the basics of it:
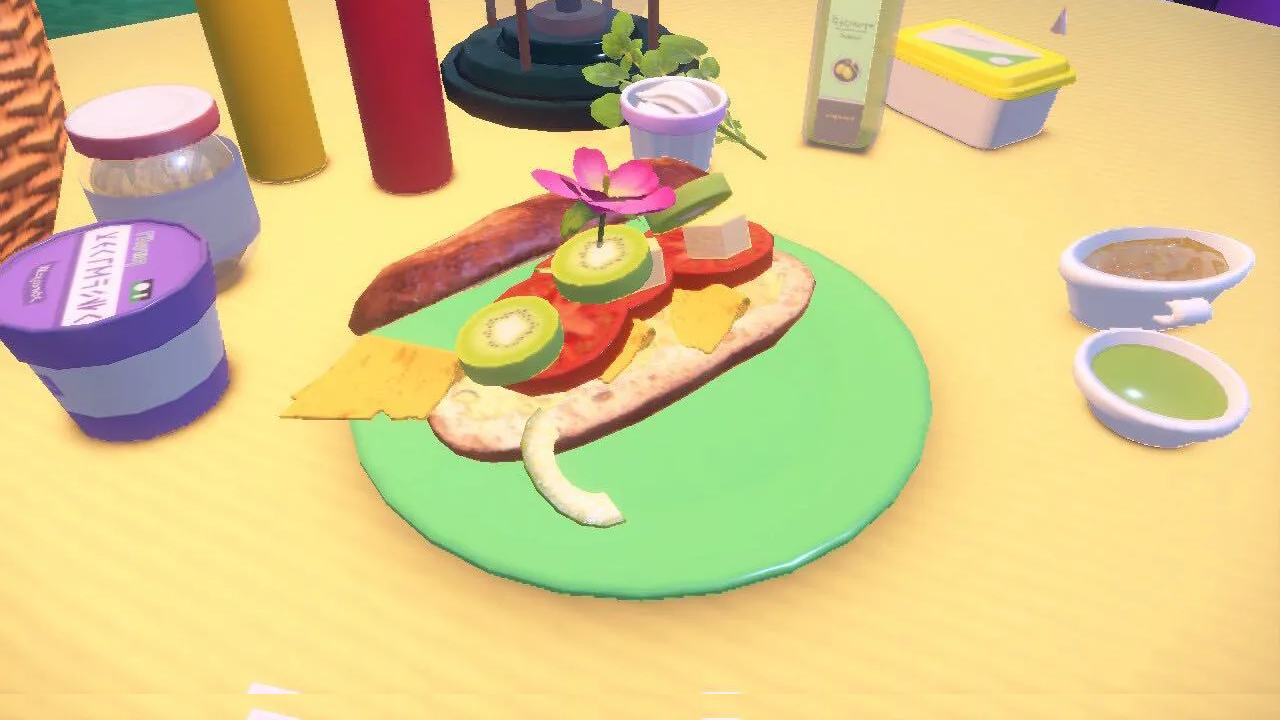
The innards of your sandwich determine what the 3 buffs it gives are, like humungo power, encounter power, etc.
The meat and spices determine type.
These sandwiches with 30-min effects will make tons of that specific type of Pokémon appear with a high chance of shinies!
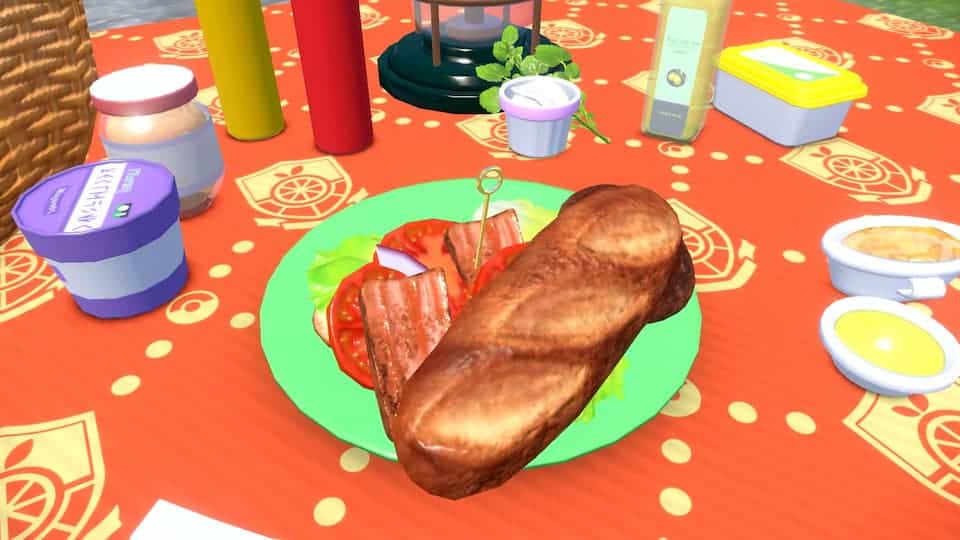
Avocado and lettuce go really solid together and basically guarantee 3 stars ★★★, even if the sandwich falls apart.
This is the easiest way to make each sandwich. Don’t even need every ingredient and it lasts just as long.
- Normal: 1X Chorizo, 2X Salty Herba Mystica
- Fire: 1X Basil, 1X Sweet Herba Mystica, 1X Salty Herba Mystica
- Water: 1X Cucumber, 2X Salty Herba Mystica
- Grass: 1X Lettuce, 1X Salty Herba Mystica, 1X Sour Herba Mystica
- Flying: 1X Prosciutto, 2X Salty Herba Mystica
- Fighting: 1X Pickles, 2X Salty Herba Mystica
- Poison: 1X Noodles, 2X Salty Herba Mystica
- Electric: 1X Yellow Bell Pepper, 1X Salty Herba Mystica, 1X Spicy Herba Mystica
- Ground: 1X Ham, 2X Salty Herba Mystica
- Rock: 1X Jalapeno, 2X Salty Herba Mystica
- Psychic: 1X White Onion, 2X Salty Herba Mystica
- Ice: 1X Klawf Stick, 2X Salty Herba Mystica
- Bug: 1X Cherry Tomatoes, 2X Salty Herba Mystica
- Ghost: 1X Red Onion, 2X Salty Herba Mystica
- Steel: 1X Hamburger, 1X Sweet Herba Mystica, 1X Salty Herba Mystica
- Dragon: 1X Avocado, 2X Salty Herba Mystica
- Dark: 1X Smoked Fillet, 1X Sweet Herba Mystica, 1X Salty Herba Mystica
- Fairy: 1X Tomatoes, 2X Salty Herba Mystica
Pokémon Scarlet and Violet Sandwich Ingredient List
POKÉMON SCARLET AND VIOLET SANDWICH INGREDIENT LIST
POKEMON INGREDIENTS
| Ingredient | Where to buy | Cost | Descriptions |
|---|---|---|---|
| Banana | Sure Cans | $80 | A very sweet ingredient. This go-to fruit is sweet and rich, and it’s beloved by many Pokémon. |
| Strawberry | Sure Cans | $140 | A very and sweet ingredient, popular for its ability to make a sandwich visually striking. |
| Tomato | Sure Cans | $100 | This very tart ingredient has a lot of savory elements to it, making it popular with many Pokémon. |
| Pickle | Sure Cans | $90 | This very sour ingredient is made by pickling veggies in a flavorful brine from made spices and vinegar. |
| Apple | Sure Cans | $130 | This very ingredient is sliced thin to make it easy to add into sandwich. |
| Cherry Tomatoes | Sure Cans | $120 | A very tart ingredient. Some varities are also very sweet, and these are prized above all others by the people of Paldea. |
| Kiwi | Sure Cans | $180 | A very tart ingredient that has a light touch of sweetness as well. It goes well with rich ingredients. |
| Jalapeno | Sure Cans | $220 | A very spicy ingredient — so spicy as to leave no room for ambivalence about it. You either like it or you don’t. |
| Pineapple | Sure Cans | $250 | This very tart ingredient is a fruit of southern lands, and its color and texture are a thrill. It’s been cut into chunks to be more easily managable. |
| Noodles | Sure Cans | $280 | A nice salty ingredient. It’s unclear how well these boiled noodles will serve as sandwich. |
| Rice | Sure Cans | $280 | An ingredient with a touch of sweetness. It’s unclear how well this is cooked rice will serve as a sandwich filling. |
| Egg | Deli Cioso | $80 | An ingredient with a touch of saltness. It’s full of nutrients and can be enjoyed with all sorts of seasonings. |
| Potato Salad | Deli Cioso | $110 | This very tart ingredient — a soft salad that’s all about potatoes — pairs tremendously well with bread. |
| Chorizo | Deli Cioso | $150 | A very salty and spicy ingredient. This type of sausage has particularly robust salty flavor, and the spicier varieties are extra popular. |
| Bacon | Deli Cioso | $150 | This very salty ingredient has been cooked just shy of charred, making with fragrance and tasty flavor. |
| Potato Tortilla | Deli Cioso | $250 | A very salty ingredient and a popular dish in Paldea. It’s undeniably filling. |
| Proscuitto | Deli Cioso | $200 | This ingredient is very salty like regular ham, but the difference is proscuitto is not cooked after it is cured, giving it a fun freshness. |
| Cucumber | Deli Cioso | $130 | A tart and bitter ingredient. Using it together with rich-tasting ingredients in a sandwich will really make the most of a cusumber’s fresh-veggie aroma. |
| Avocado | Deli Cioso | $180 | An ingredient with sweet notes — though its flavor is very mild. The avocado’s richness, however, makes it satisfying to eat. |
| Red Onion | Deli Cioso | $230 | An ingredient with some sweetness to it. Its spiciness and fragrance are milder than those of other onions, making it a pleasant bite. |
| Hamburger | Deli Cioso | $380 | This very salty ingredient is the thing to add if you want to make your sandwich truly filling. |
| Smoked fillet | Deli Cioso | $270 | A very salty and bitter ingredient with that unmistakable smoky flavor. It pairs exceptionally well with veggies. |
| Watercress | Deli Cioso | $270 | A very bitter ingredient that stands out among veggies for its quirky flavor. People tend to either like it or not like it — they rarely sit on the fence. |
| Vingear | Deli Cioso | $300 | A very sour condiment. Vinegars derived from grapes are popular in Paldea. Hihgly effective when used to add just a light note of flavor. |
| Chili Sauce | Deli Cioso | $320 | A condiment with a very spicy kick. it’s thanks to Scovillian that this sauce gets it signature mouth-tingling burn. |
| Basil | Deli Cioso | $280 | A very bitter ingredient that’s quite versatile, as herbs go. It’s fragrant and goes well with tomatoes. |
| Green Bell Pepper | Deli Cioso | $230 | An ingredient with some bitterness. When sliced, it adds a nice accent to a sandwich. |
| Red Bell Pepper | Deli Cioso | $240 | An ingredient with some bitterness — but its bitter notes and overall flavor are pleasantly mild compared to its green cousin. |
| Yellow Bell Pepper | Deli Cioso | $240 | An ingredient with some bitterness. It’s not much different from its red counterpart in flavor, but mixing these colors is a feast for the eyes. |
| Fried Fillet | Deli Cioso | $360 | When used in a sandwich, this very salty and bitter ingredient is at its best paired with sour seasoning. |
| Herbed sausage | Deli Cioso | $400 | A very salty and bitter ingredient. The balance between the potent saltiness and the herbs’ bitterness makes this sausage a pleasure. |
| Ham | Artisan Bakery | $170 | A very salty ingredient — and that very saltiness is what makes it such a nice companion to veggies. |
| Lettuce | Artisan Bakery | $90 | This bitter-tasting ingredient is simple and straightforward — just add it to all kinds of other ingredients for a delightfully crunch time. |
| Onion | Artisan Bakery | $130 | This spicy veggie is indispensible to many sandwiches. It goes well with rich ingredients. |
| Mayonaise | Artisan Bakery | $120 | A condiment that packs a very tart punch yet pairs well with various ingredients. |
| Ketchup | Artisan Bakery | $110 | A condiment with very salty and tart flavor. While a number of other ingredients go into its signature flavor, the noble tomato is its heart and soul. |
| Mustard | Artisan Bakery | $130 | A very spicy condiment that’s indispensable when bread is on the table. It pairs tremendously with ketchup. |
| Salt | Artisan Bakery | $90 | A very salty seasoning, unsurpisingly. People quite like the grains of salt that can be gathered from the footprints of a particularly jagged Naclstack. |
| Pepper | Artisan Bakery | $100 | A seasoning peacking very spicy flavor. It goes nicely with oilier foods and works especially when when you add just a pinch for a hint of flavor. |
| Butter | Artisan Bakery | $250 | A condiment that unites salty and sweet and also packs a richness that makes bread a delight to eat. The finest butter products are made of 100 percent Moomoo Milk. |
| Cream Cheese | Artisan Bakery | $280 | A condiment offering very sweet and very tart flavor. It goes well with more ingredients than you’d expect, making it a convient go-to. |
| Jam | Artisan Bakery | $120 | A condiment that’s very sweet and likewise very sour. Take care when adding it to sandwiches, as the sweet can overwhelm. |
| Olive Oil | Artisan Bakery | $300 | A condiment offering faint notes of sour and bitter flavors. The most prized varieties are the ones Smoliv love the smell of — such oils’ quality is assured. |
| Cheese | Artisan Bakery | $120 | A very salty ingredient. This thinly sliced cheese is perfect for adding to a sandwich. |
| Yogurt | Artisan Bakery | $140 | A condiment that’s very sweet and very sour. It goes especially well with fruit and is easy to incorporate into a sandwich. |
| Whipped Cream | Artisan Bakery | $140 | A very sweet condiment. Folks in Paldea seem to love the varieties that really let the sweetness sing. |
| Peanut Butter | Artisan Bakery | $300 | A very sweet condiment. People in Paldea in Paldea seem to favor the sweet varieties over the unsweetened. |
| Marmalade | Artisan Bakery | $260 | A condiment with sour and bitter notes. It’s surprisingly useful, as it makes a nice counterpoint to oilier foods. |
| Klawf Stick | Aquiesta Supermarket | $500 | A very sweet and salty ingredient. It’s a nutritious processed food made with a concentrate derived from shed Klawf shells. |
| Tofu | Aquiesta Supermarket | $260 | An ingredient with a touch of sweetness. It’s unclear how well this raw block of tofu will serve as a sandwich filling. |
| Horseradish | Aquiesta Supermarket | $410 | A very spicy condiment. Its distinctive sharp sizzle in your sinuses makes it a good match for rich fillings. |
| Curry Powder | Aquiesta Supermarket | $450 | A very spicy condiment. Just watch out — use too much of this potent seasoning, and it’ll cancel out the other flavors. |
| Wasabi | Aquiesta Supermarket | $330 | This very spicy condiment seems close to horseradish at first, but you’ll find that it has a superb flavor all its own. |
POKEMON SANDWICHES
| Sandwich | IngRedients | Effects |
|---|---|---|
| Jambon-Beurre | Ham, Butter | Encounter Power: Ground (Lv. 1), Raid Power: Ghost (Lv. 1), Catching Power: Bug (Lv. 1) |
| Bitter Jambon-Beurre | Ham, Butter, Bitter Herba Mystica | Title Power: Ground (Lv. 2), Exp. Point Power: Ghost (Lv. 2), Encounter Power: Bug (Lv. 2) |
| Sweet Jambon-Beurre | Ham, Butter, Sweet Herba Mystica | Title Power: Ground (Lv. 2), Egg Power (Lv. 2), Encounter Power: Bug (Lv. 2) |
| Salty Jambon-Beurre | Ham, Butter, Salty Herba Mystica | Title Power: Ground (Lv. 2), Encounter Power: Ghost (Lv. 2), Raid Power: Bug (Lv. 2) |
| Sour Jambon-Beurre | Ham, Butter, Sour Herba Mystica | Title Power: Ground (Lv. 2), Teensy Power: Ghost (Lv. 2), Encounter Power: Bug (Lv. 2) |
| Spicy Jambon-Beurre | Ham, Butter, Spicy Herba Mystica | Title Power: Gound (Lv. 2), Humungo Power: Ghost (Lv. 2), Encounter Power: Bug (Lv. 2) |
| Jam Sandwich | Strawberry, Jam | Catching Power: Fighting (Lv. 1), Item Drop Power: Psychic (Lv. 1), Egg Power (Lv. 1) |
| Great Jam Sandwich | Strawberry, Jam, Yogurt | Catching Power: Fighting (Lv. 1), Item Drop Power: Psychic (Lv. 1), Raid Power: Ghost (Lv. 1) |
| Ultra Jam Sandwich | Strawberry, Jam, Pineapple, Yogurt, Jam | Catching Power: Dark (Lv. 2), Item Drop Power: Ground (Lv. 2), Egg Power (Lv. 1) |
| Master Jam Sandwich | Strawberry, Pineapple, Jam, Yogurt, Sweet Herba Mystica | Title Power: Dark (Lv. 2), Catching Power: Ground (Lv. 2), Item Drop Power: Fighting (Lv. 2) |
| Pickle Sandwich | Pickle, Olive Oil | Teensy Power: Fighting (Lv. 1), Encounter Power: Fire (Lv. 1), Catching Power: Ghost (Lv. 1) |
| Great Pickle Sandwich | Pickle, Watercress, Olive Oil | Item Drop Power: Fighting (Lv. 2), Encounter Power: Fire (Lv. 1), Catching Power: Ghost (Lv. 1) |
| Ultra Pickle Sandwich | Pickle, Watercress, Basil, Olive Oil | Item Drop Power: Fighting (Lv. 2), Egg Power (Lv. 2), Catching Power: Fir (Lv. 1) |
| Master Pickle Sandwich | Pickle, Watercress, Basil, Olive Oil, Sour Herba Mystica | Title Power: Fighting (Lv. 2), Teensy Power: Grass (Lv. 2), Egg Power (Lv. 2) |
| Desert Sandwich | Apple x2, Yogurt, Whipped Cream | Catching Power: Flying (Lv. 1), Item Drop Power: Ice (Lv. 1), Egg Power (Lv. 1) |
| Great Desert Sandwich | Apple x2, Kiwi, Yogurt, Whipped Cream | Catching Power: Flying (Lv. 2), Item Drop Power: Ice (Lv. 1), Egg Power (Lv. 1) |
| Ultra Desert Sandwich | Apple x2, Kiwi, strawberry, Yogurt, Whipped Cream | Item Drop Power: Flying (Lv. 2), Catching Power: Ice (Lv. 2), Egg Power (Lv. 1) |
| Master Desert Sandwich | Apple x2, Kiwi, Strawberry, Yogurt, Whipped Cream, Sweet Herba Mystica | Title Power: Flying (Lv. 2), Item Drop Power: Poison (Lv. 2), Catching Power: Fairy (Lv. 2) |
| Avocado Sandwich | Avocado, Smoked Fillet, Salt | Exp. Point Power: Dragon (Lv. 1), Encounter Power: Electric (Lv. 1), Catching Power: Dark (Lv. 1) |
| Great Avocado Sandwich | Avocado, Smoked Fillet, Tomato, Salt | Encounter Power: Dragon (Lv. 2), Catching Power: Fairy (Lv. 1), Exp. Point Power: Dark (Lv. 1) |
| Ultra Avocado Sandwich | Avocado, Smoked Fillet, Tomato, Lettuce, Salt | Exp. Point Power: Grass (Lv. 2), Encounter Power: Dark (Lv. 2), Catching Power (Lv. 1) |
| Master Avocado Sandwich | Avocado, Smoked Fillet, Tomato, Lettuce, Salt, Salty Herba Mystica | Title Power: Grass (Lv. 2), Exp. Point Power: Dark (Lv. 2), Encounter Power: Dragon (Lv. 2) |
| Egg Sandwich | Egg, Cucumber, Salt, Mayonnaise | Encounter Power: Flying (Lv. 1), Exp. Point Power: Steel (Lv. 1), Raid Power: Rock (Lv. 1) |
| Great Egg Sandwich | Egg, Cucumber, Red Onion, Salt, Mayonnaise | Encounter Power: Flying (Lv. 2), Exp. Point Power: Steel (Lv. 1), Raid Power: Rock (Lv. 1) |
| Ultra Egg Sandwich | Egg, Cucumber, Red Onion, Cheese, Salt, Mayonnaise | Encounter Power: Flying (Lv. 2), Exp. Point Power: Steel (Lv. 2), Raid Power: Rock (Lv. 1) |
| Master Egg Sandwich | Egg, Cucumber, Red Onion, Cheese, Salt, Mayonnaise, Salty Herba Mystica | Title Power: Flying (Lv. 2), Encounter Power: Rock (Lv. 2), Exp. Point Power: Normal (Lv. 2) |
| Classic Bocadillo | Bacon, Cheese, Potato Tortilla, Olive Oil | Encounter Power: Ghost (Lv. 1), Catching Power: Grass (Lv. 1), Item Drop Power: Fire (Lv. 1) |
| Great Classic Bocadillo Sandwich | Bacon, Cheese, Potato Tortilla, Olive Oil, Curry Powder | Humungo Power: Ghost (Lv. 2), Catching Power: Grass (Lv. 1), Encounter Power: Fire (Lv. 1) |
| Ultra Classic Bocadillo Sandwich | Bacon, Cheese, Potato Tortilla, Avocado, Olive Oil, Curry Powder | Humungo Power: Dragon (Lv. 2), Catching Power: Fire (Lv. 2), Encounter Power: Ghost (Lv. 1) |
| Master Classic Bocadilla | Bacon, Cheese, Potato Torilla, Avocado, Olive Oil, Curry Powder, Bitter Herba Mystica | Title Power: Dragon (Lv. 2), Item Drop Power: Ghost (Lv. 2), Catching Power: Normal (Lv. 2) |
| BLT Sandwich | Bacon, Lettuce, Tomato, Mayonnaise, Mustard | Teensy Power: Rock (Lv. 1), Encounter Power: Fairy (Lv. 1), Catching Power: Grass (Lv. 1) |
| Great BLT Sandwich | Bacon, Lettuce, Tomato, Basil, Mayonnaise, Mustard | Teensy Power: Grass (Lv. 2), Encounter Power: Rock (Lv. 2), Raid Power: Fairy (Lv. 1) |
| Ultra BLT Sandwich | Bacon, Lettuce, Tomato, Basil, Cheese, Mayonnaise, Mustard | Teensy Power: Grass (Lv. 2), Encounter Power: Rock (Lv. 2), Catching Power: Fairy (Lv. 1) |
| Master BLT Sandwich | Bacon, Lettuce, Tomato, Basil, Cheese, Mayonnaise, Mustard, Sweet Herba Mystica | Title Power: Grass (Lv. 2), Catching Power: Fairy (Lv. 2), Encounter Power: Normal (Lv. 2) |
| Ham Sandwich | Pickle, Ham, Mayonnaise, Mustard | Teensy Power: FIghting (Lv. 1), Encounter Power: Normal (Lv. 1), Raid Power: Ground (Lv. 1) |
| Great Ham Sandiwch | Pickle, Ham, Bacon, Mayonnaise, Mustard | Encounter Power: Fighting (Lv. 2), Catching Power: Flying (Lv. 1), Raid Power: Ground (Lv. 1) |
| Ultra Ham Sandwich | Pickle, Ham, Bacon, Jalapeño, Mayonnaise, Mustard | Teensy Power: Rock (Lv. 2), Encounter Power: Fairy (Lv. 2), Catching Power: Grass (Lv. 1) |
| Master Ham Sandwich | Pickle, Ham, Bacon, Jalapeño, Mayonnaise, Mustard, Salty Herba Mystica | Title Power: Rock (Lv. 2), Encounter Power: Fairy (Lv. 2), Catching Power: Grass (Lv. 2) |
| Cheese Sandwich | Cheese, Cream Cheese, Pepper, Salt | Encounter Power: Bug (Lv. 1), Raid Power: Water (Lv. 1), Exp. Point Power: Steel (Lv. 1) |
| Great Cheese Sandwich | Cheese, Avocado, Cream Cheese, Pepper, Salt | Encounter Power: Dragon (Lv. 2), Raid Power: Steel (Lv. 1), Exp. Point Power: Bug (Lv. 1) |
| Ultra Cheese Sandwich | Cheese, Avocado, Basil, Cream Cheese, Pepper, Salt | Exp. Point Power: Dragon (Lv. 2), Raid Power: Electric (Lv. 2), Catching Power: Water (Lv. 1) |
| Master Cheese Sandwich | Cheese, Avocado, Basil, Cream Cheese, Pepper, Salt, Salty Herba Mystica | Title Power: Dragon (Lv. 2), Exp. Point Power: Electric (Lv. 2), Raid Power: Water (Lv. 2) |
| Hamburger Patty Sandwich | Hamburger, Onion, Vinegar, Pepper | Humungo Power: Pyshic (Lv. 1), Encounter Power: Dragon (Lv. 1), Catching Power: Steel (Lv. 1) |
| Great Hamburger Patty Sandwich | Hamburger, Onion, Vinegar, Pepper, Horseradish | Humungo Power: Psychic (Lv. 2), Encounter Power: Dragon (Lv. 1), Catching Power: Steel (Lv. 1) |
| Ultra Hamburger Sandwich | Hamburger, Onion, Watercress, Vinegar, Pepper, Horseradish | Humungo Power: Psychic (Lv. 2), Encounter Power: Dragon (Lv. 2), Catching Power: Steel (Lv. 1) |
| Master Hamburger Sandwich | Hamburger, Onion, Watercress, Vinegar, Pepper, Horseradish, Sweet Herba Mystica | Title Power: Psychic (Lv. 2), Raid Power: Dragon (Lv. 2), Encounter Power: Steel (Lv. 2) |
| Smoky Sandwich | Smoked Fillet, Watercress, Vinegar, Pepper, Salt | Exp. Point Power: Dark (Lv. 1), Raid Power: Dragon (Lv. 1), Encounter Power: Psychic (Lv. 1) |
| Great Smoky Sandwich | Smoked Fillet, Watercress, Red Onion, Vinegar, Pepper, Salt | Exp. Point Power: Ghost (Lv. 2), Raid Power: Psychic (Lv. 1), Encounter Power: Dark (Lv. 1) |
| Ultra Smoky Sandwich | Smoked Fillet, Watercress, Red Onion, Basil, Vinegar, Pepper, Salt | Exp. Point Power: Dark (Lv. 2), Raid Power: Psychic (Lv. 2), Encounter Power: Ghost (Lv. 1) |
| Master Smoky Sandwich | Smoked Fillet, Watercress, Red Onion, Basil, Vinegar, Pepper, Salt, Salty Herba Mystica | Title Power: Dark (Lv. 2), Exp. Point Power: Psychic (Lv. 2), Raid Power: Ghost (Lv. 2) |
| Variety Sandwich | Bacon, Tomato, Smoked Fillet, Salt, Vinegar | Teensy Power: Flying (Lv. 1), Encounter Power: Dark (Lv. 1), Catching Power: Bug (Lv. 1) |
| Great Variety Sandwich | Bacon, Tomato, Smoked Fillet, Potato Salad, Salt, Vinegar | Teensy Power: Bug (Lv. 2), Encounter Power: Dragon (Lv. 1), Catching Power: Dark (Lv. 1) |
| Ultra Variety Sandwich | Bacon, Tomato, Smoked Fillet, Potato Salad, Hamburger, Salt, Vinegar | Encounter Power: Bug (Lv. 2), Catching Power: Dark (Lv. 2), Humungo Power: Steel (Lv. 1) |
| Master Variety Sandwich | Bacon, Tomato, Smoked Fillet, Potato Salad, Hamburger, Salt, Vinegar, Bitter Herba Mystica | Title Power: Bug (Lv. 2), Exp. Point Power: Steel (Lv. 2), Encounter Power: Normal (Lv. 2) |
| Sweet Sandwich | Banana, Apple, Cheese, Whipped Cream, Butter | Egg Power (Lv. 1), Item Drop Power: Bug (Lv. 1), Raid Power: Flying (Lv. 1) |
| Great Sweet Sandwich | Banana, Apple, Cheese, Whipped Cream, Butter, Salt | Egg Power (Lv. 2), Item Drop Power: Bug (Lv. 1), Raid Power: Flying (Lv. 1) |
| Ultra Sweet Sandwich | Banana, Apple, Cheese, Basil, Whipped Cream, Butter, Salt | Egg Power (Lv. 2), Item Drop Power: Flying (Lv. 2), Raid Power: Normal (Lv. 1) |
| Master Sweet Sandwich | Banana, Apple, Cheese, Basil, Whipped Cream, Butter, Salt, Sour Herba Mystica | Title Power: Electric (Lv. 2), Catching Power: Normal (Lv. 2), Item Drop Power: Fighting (Lv. 2) |
| Five-Alarm Sandwich | Chorizo, Onion, Green Bell Pepper, Mustard, Ketchup, Pepper | Humungo Power: Poison (Lv. 1), Exp. Point Power: Normal (Lv. 1), Raid Power: Dragon (Lv. 1) |
| Great Five-Alarm Sandwich | Chorizo, Onion, Green Bell Pepper, Basil, Mustard, Ketchup, Pepper | Humungo Power: Poison (Lv. 2), Raid Power: Fire (Lv. 1), Exp. Point Power: Dragon (Lv. 1) |
| Ultra Five-Alarm Sandwich | Chorizo, Onion, Green Bell Pepper, Basil, Jalapeño, Mustard, Ketchup, Pepper | Humungo Power: Poison (Lv. 2), Raid Power: Fire (Lv. 2), Exp. Point Power: Dragon (Lv. 1) |
| Master Five-Alarm Sandwich | Chorizo, Onion, Green Bell Pepper, Basil, Jalapeño, Mustard, Ketchup, Pepper, Spicy Herba Mystica | Title Power: Dragon (Lv. 2), Humungo Power: Dragon (Lv. 2), Raid Power: Normal (Lv. 2) |
| Potato Salad Sandwich | Potato Salad, Cucumber, Red Bell Pepper, Mayonnaise | Teensy Power: Bug (Lv. 1), Encounter Power: Steel (Lv. 1), Catching Power: Ghost (Lv. 1) |
| Great Potato Salad | Potato Salad, Cucumber, Red Bell Pepper, Avocado, Mayonnaise | Catching Power: Dragon (Lv. 2), Encounter Power: Ghost (Lv. 1), Humungo Power: Bug (Lv. 1) |
| Ultra Potato Salad | Potato Salad, Cucumber, Red Bell Pepper, Avocado, Red Onion, Mayonnaise | Catching Power: Ghost (Lv. 2), Encounter Power: Bug (Lv. 2), Humungo Power: Dragon (Lv. 1) |
| Master Potato Salad Sandwich | Potato Salad, Cucumber, Red Bell Pepper, Avocado, Red Onion, Mayonnaise, Sweet Herba Mystica | Title Power: Ghost (Lv. 2), Catching Power: Dragon (Lv. 2), Encounter Power: Normal (Lv. 2) |
| Marmalade Sandwich | Cheese, Marmalade | Item Drop Power: Fighting (Lv. 1), Catching Power: Rock (Lv. 1), Egg Power (Lv. 1) |
| Great Marmalade Sandwich | Cheese, Marmalade, Butter | Egg Power (Lv. 2), Raid Power: Rock (Lv. 1), Item Drop: Poison (Lv. 1) |
| Ultra Marmalade Sandwich | Cheese, Marmalade, Butter, Yogurt | Egg Power (Lv. 2), Item Drop Power: Poison (Lv. 2), Raid Power: Fighting (Lv. 1) |
| Master Marmalade Sandwich | Cheese, Marmalade, Butter, Yogurt, Salty Herba Mystica | Title Power: Bug (Lv. 2), Encounter Power: Poison (Lv. 2), Item Drop Power: Fighting (Lv. 2) |
| Peanut Butter Sandwich | Banana, Peanut Butter | Egg Power (Lv. 1), Item Drop Power: Electric (Lv. 1), Raid Power: Bug (Lv. 1) |
| Great Peanut Butter Sandwich | Banana, Peanut Butter, Butter | Egg Power (Lv. 2), Raid Power: Electric (Lv. 2), Exp. Point Power: Normal (Lv. 1) |
| Ultra Peanut Butter Sandwich | Banana, Peanut Butter, Butter, Jam | Egg Power (Lv. 2), Raid Power: Normal (Lv. 2), Item Drop Power: Bug (Lv. 1) |
| Master Peanut Butter Sandwich | Banana, Peanut Butter, Butter, Jam, Spicy Herba Mystica | Title Power: Electric (Lv. 2), Raid Power: Normal (Lv. 2), Item Drop Power: Bug (Lv. 2) |
| Noodle Sandwich | Noodles, Olive Oil, Ketchup | Encounter Power: Poison (Lv. 1), Raid Power: Rock (Lv. 1), Humungo Power: Ground (Lv. 1) |
| Great Noodle Sandwich | Noodles, Lettuce, Olive Oil, Ketchup | Encounter Power: Poison (Lv. 2), Humungo Power: Rock (Lv. 1), Raid Power: Ground (Lv. 1) |
| Ultra Noodle Sandwich | Noodles, Lettuce, Chorizo, Olive Oil, Ketchup | Encounter Power: Poison (Lv. 2), Exp. Point Power: Fire (Lv. 2), Humungo Power: Electric (Lv. 1) |
| Master Noodle Sandwich | Noodles, Lettuce, Chorizo, Olive Oil, Ketchup, Bitter Herba Mystica | Title Power: Poison (Lv. 2), Exp. Point Power: Electric (Lv. 2), Encounter Power: Normal (Lv. 2) |
| Fried Fillet Sandwich | Fried Fillet, Potato Salad, Mayonnaise, Ketchup | Teensy Power: Bug (Lv. 1), Raid Power: Dark (Lv. 1), Exp. Point Power: Steel (Lv. 1) |
| Great Fried Fillet Sandwich | Fried Fillet, Potato Salad, Lettuce, Mayonnaise, Ketchup | Teensy Power: Bug (Lv. 2), Raid Power: Dark (Lv. 1), Catching Power: Steel (Lv. 1) |
| Ultra Fried Fillet Sandwich | Fried Fillet, Potato Salad, Lettuce, Mayonnaise, Ketchup, Horseradish | Teensy Power: Bug (Lv. 2), Raid Power: Dark (Lv. 2), Encounter Power: Steel (Lv. 1) |
| Master Fried Fillet Sandwich | Fried Fillet, Potato Salad, Lettuce, Mayonnaise, Ketchup, Horseradish, Spicy Herba Mystica | Title Power: Bug (Lv. 2), Humungo Power: Steel (Lv. 2), Raid Power: Normal (Lv. 2) |
| Fruit Sandwich | Banana, Apple, Pineapple, Kiwi, Whipped Cream | Item Drop Power: Normal (Lv. 1), Catching Power: Ground (Lv. 1), Egg Power (Lv. 1) |
| Great Fruit Sandwich | Banana, Apple, Pineapple, Kiwi, Whipped Cream, Marmalade | Item Drop Power: Normal (Lv. 2), Catching Power: Poison (Lv. 1), Egg Power (Lv. 1) |
| Ultra Fruit Sandwich | Banana, Apple, Pineapple, Kiwi, Whipped Cream, Marmalade, Yogurt | Item Drop Power: Normal (Lv. 2), Catching Power: Poison (Lv. 2), Egg Power (Lv. 1) |
| Master Fruit Sandwich | Banana, Apple, Pineapple, Kiwi, Whipped Cream, Marmalade, Yogurt, Sweet Herba Mystica | Title Power: Normal (Lv. 2), Item Drop Power: Poison (Lv. 2), Catching Power: Flying (Lv. 2) |
| Hefty Sandwich | Potato Tortilla, Fried Fillet, Bacon, Potato Salad, Salt, Peanut Butter | Encounter Power: Steel (Lv. 1), Raid Power: Ghost (Lv. 1), Catching Power: Bug (Lv. 1) |
| Great Hefty Sandwich | Potato Tortilla, Fried Fillet, Bacon, Potato Salad, Herbed Sausage, Salt, Peanut Butter | Encounter Power: Ghost (Lv. 2), Raid Power: Psychic (Lv. 2), Catching Power: Dark (Lv. 1) |
| Ultra Hefty Sandwich | Potato Tortilla, Fried Fillet, Bacon, Potato Salad, Herbed Sausage, Hamburger, Salt, Peanut Butter | Title Power: Ghost (Lv. 2), Teensy Power: Dark (Lv. 2), Catching Power: Normal (Lv. 2) |
| Master Hefty Sandwich | Potato Tortilla, Fried Fillet, Bacon, Potato Salad, Herbed Sausage, Hamburger, Salt, Peanut Butter, Salty Herba Mystica | |
| Tofu Sandwich | Tofu x2, Rice, Lettuce, Avocado, Horseradish, Salt | Encounter Power: Normal (Lv. 1), Egg Power: Lvl. 1), Catching Power, Grass (Lv. 1) |
| Great Tofu Sandwich | Tofu x2, Rice, Lettuce, Avocado, Horseradish, Wasabi, Salt, Horseradish | Encounter Power: Normal (Lv. 2), Raid Power: Fighting (Lv. 1), Catching Power: Grass (Lv. 1) |
| Ultra Tofu Sandwich | Tofu x2, Rice, Lettuce, Avocado, Watercress, Wasabi, Salt, Horseradish | Raid Power: Normal (Lv. 2), Encounter Power: Fighting (Lv. 2), Catching Power: Grass (Lv. 1) |
| Master Tofu Sandwich | Tofu x2, Rice, Lettuce, Avocado, Watercress, Wasabi, Salt, Horseradish, Salty Herba Mystica | Title Power: Normal (Lv. 2), Encounter Power: Grass (Lv. 2), Catching Power: Fighting (Lv. 2) |
| Herbed Sausage Sandwich | Herbed Sausage, Ketchup | Encounter Power: Fighting (Lv. 1), Exp. Point Power: Ghost (Lv. 1), Raid Power: Ground (Lv. 1) |
| Great Herbed Sausage | Herbed Sausage, Ketchup, Mustard | Encounter Power: Ground (Lv. 2), Exp. Point Power: Ghost (Lv. 1), Raid Power: Fighting (Lv. 1) |
| Ultra Herbed Sausage | Herbed Sausage, Lettuce, Ketchup, Mustard | Exp. Point Power: Ground (Lv. 2), Raid Power: Ghost (Lv. 2), Encounter Power: Fighting (Lv. 1) |
| Legendary Herbed Sausage Sandwich | Herbed Sausage, Lettuce, Ketchup, Mustard, Bitter Herba Mystica | Title Power: Ground (Lv. 2), Exp. Point Power: Fighting (Lv. 2), Raid Power: Normal (Lv. 2) |
| Curry-and-Rice-Style Sandwich | Rice, Curry Powder, Mayonnaise | Humungo Power: Normal (Lv. 1), Encounter Power: Fire (Lv. 1), Raid Power: Fighting (Lv. 1) |
| Great Curry-and-Rice-Style Sandwich | Rice, Jalapeño, Curry Powder, Mayonnaise | Humungo Power: Grass (Lv. 2), Encounter Power: Fighting (Lv. 1), Item Drop Power: Normal (Lv. 1) |
| Ultra Curry-and-Rice-Style Sandwich | Rice, Jalapeño, Tomato, Curry Powder, Mayonnaise | Humungo Power: Grass (Lv. 2), Encounter Power: Normal (Lv. 2), Item Drop Power: Fairy (Lv. 1) |
| Master Curry-and-Rice Sandwich | Rice, Jalapeño, Tomato, Curry Powder, Mayonnaise, Spicy Herba Mystica | Title Power: Grass (Lv. 2), Humungo Power: Fairy (Lv. 2), Encounter Power: Normal (Lv. 2) |
| Zesty Sandwich | Jalapeño, Onion, Herbed Sausage | Humungo Power: Psychic (Lv. 1), Exp. Pointer Power: Fighting (Lv. 1), Encounter Power: Water (Lv. 1) |
| Great Zesty Sandwich | Jalapeño, Onion, Herbed Sausage, Green Bell Pepper | Humungo Power: Pysychic (Lv. 2), Encounter Power: Fighting (Lv. 1), Exp. Point Power: Water (Lv. 1) |
| Ultra Zesty Sandwich | Jalapeño, Onion, Herbed Sausage, Green Bell Pepper, Watercress | Humungo Power: Psychic (Lv. 2), Encounter Power: Ground (Lv. 2), Exp. Point Power: Fighting (Lv. 1) |
| Master Zesty Sandwich | Jalapeño, Onion, Herbed Sausage, Green Bell Pepper, Watercress, Sour Herba Mystica | Title Power: Psychic (Lv. 2), Teensy Power: Fighting (Lv. 2), Encounter Power: Normal (Lv. 2) |
| Refreshing Sandwich | Tomato, Avocado, Horseradish, Salt | Catching Power: Bug (Lv. 1), Encounter Power: Fighting (Lv. 1), Raid Power: Dragon (Lv. 1) |
| Great Refreshing Sandwich | Tomato, Avocado, Kiwi, Marmalade, Salt | Catching Power: Dragon (Lv. 2), Encounter Power: Fire (Lv. 1), Item Drop Power: Poison (Lv. 1) |
| Ultra Refreshing Sandwich | Tomato, Avocado, Kiwi, Pickle, Marmalade, Salt | Catching Power: Dragon (Lv. 2), Encounter Power: Fighting (Lv. 2), Item Drop Power: Poisons (Lv. 1) |
| Master Refreshing Sandwich | Tomtato, Avocado, Kiwi, Pickle, Marmalade, Salt, Spicy Herba Mystica | Title Power: Dragon (Lv. 2), Humungo Power: Poison (Lv. 2), Encounter Power: Normal (Lv. 2) |
| Spicy-Sweet Sandwich | Hamburger, Tomato, Kiwi, Pineapple, Butter, Horseradish | Catching Power: Poison (Lv. 1), Encounter Power: Fire (Lv. 1), Item Drop Power: Ground (Lv. 1) |
| Great Spicy-Sweet Sandwich | Hamburger, Tomato, Kiwi, Avocado, Pineapple, Butter, Horseradish | Catching Power: Dragon (Lv. 2), Encounter Power: Ground (Lv. 1), Item Drop Power: Poison (Lv. 1) |
| Ultra Spicy-Sweet Sandwich | Hamburger, Tomato, Kiwi, Pineapple, Avocado, Cheese, Butter, Horseradish | Catching Power: Dragon (Lv. 2), Encounter Power: Ground (Lv. 2), Item Drop Power: Poison (Lv. 1) |
| Master Spicy-Sweet Sandwich | Hamburger, Tomato, Kiwi, Pineapple, Avocado, Cheese, Butter, Horseradish, Bitter Herba Mystica | Title Power: Dragon (Lv. 2), Item Drop Power: Poison (Lv. 2), Encounter Power: Normal (Lv. 2) |
| Curry-and-Noodle Sandwich | Noodles, Red Bell Pepper, Bacon, Yellow Bell Pepper, Olive Oil, Salt, Pepper | Exp. Point Power: Electric (Lv. 1), Encounter Power: Psychic (Lv. 1), Catching Power: Rock (Lv. 1) |
| Great Curry-and-Noodle Sandwich | Noodles, Red Bell Pepper, Bacon, Yellow Bell Pepper, Jalapeño, Olive Oil, Salt, Pepper | Item Drop Power: Rock (Lv. 2), Encounter Power: Psychic (Lv. 1), Catching Power: Electric (Lv. 1) |
| Ultra Curry-and-Noodle Sandwich | Noodles, Red Bell Pepper, Bacon, Jalapeño, Egg, Olive Oil, Salt, Pepper | Exp. Point Power: Rock (Lv. 2), Encounter Power: Grass (Lv. 2), Catching Power: Ice (Lv. 1) |
| Master Curry-and-Noodle Sandwich | Noodles, Red Bell Pepper, Bacon, Jalapeño, Egg, Olive Oil, Salt, Pepper, Sweet Herba Mystica | Title Power: Rock (Lv. 2), Egg Power (Lv. 2), Encounter Power: Normal (Lv. 2) |
| Tower Sandwich | Hamburger, Noodles, Potato Salad, Rice, Olive Oil, Salt, Pepper | Exp. Point Power: Steel (Lv. 1), Encounter Power: Fire (Lv. 1), Humungo Power: Ghost (Lv. 1) |
| Great Tower Sandwich | Hamburger, Noodles, Potato Salad, Rice, Klawf Stick, Olive Oil, Salt Pepper | Exp. Point Power: Steel (Lv. 2), Encounter Power: Ghost (Lv. 1), Humungo Power: Ice (Lv. 1) |
| Ultra Tower Sandwich | Hamburger, Noodles, Potato Salad, Rice, Klawf Stick, Tofu, Olive Oil, Salt, Pepper | Encounter Power: Steel (Lv. 2), Humungo Power: Ice (Lv. 2), Catching Power: Normal (Lv. 1) |
| Master Tower Sandwich | Hamburger, Noodles, Potato Salad, Rice, Klawf Stick, Tofu, Olive Oil, Salt, Pepper, Bitter Herba Mystica | Title Power: Steel (Lv. 2), Encounter Power: Normal (Lv. 2), Exp. Point Power: Fighting (Lv. 2) |
| Vegetable Sandwich | Green Bell Pepper, Tomato, Cucumber, Salt, Olive Oil, Vinegar | Teensy Power: Poison (Lv. 1), Encounter Power: Water (Lv. 1), Catching Power: Bug (Lv. 1) |
| Great Vegetable Sandwich | Green Bell Pepper, Tomato, Cucumber, Red Onion, Salt, Olive Oil, Vinegar | Encounter Power: Ghost (Lv. 2), Teensy Power: Bug (Lv. 1), Catching Power: Poison (Lv. 1) |
| Ultra Vegetable Sandwich | Green Bell Pepper, Tomato, Cucumber, Red Onion, Watercress, Salt, Olive Oil, Vinegar | Encounter Power: Ghost (Lv. 2), Teensy Power: Bug (Lv. 2), Catching Power: Poison (Lv. 1) |
| Master Vegetable Sandwich | Green Bell Pepper, Tomato, Cucumber, Red Onion, Salt, Olive Oil, Vinegar, Herba Mystica | Title Power: Ghost (Lv. 2), Encounter Power: Bug (Lv. 2), Catching Power: Poison (Lv. 2) |
| Klawf Claw Sandwich | Klawf Stick, Tomato, Lettuce, Salt, Olive Oil | Encounter Power: Grass (Lv. 1), Catching Power: Fairy (Lv. 1), Item Drop Power: Ice |
| Great Klawf Claw Sandwich | Klawf Stick, Tomato, Lettuce, Salt, Olive Oil, Wasabi | Encounter Power: Grass (Lv. 2), Catching Power: Fairy (Lv. 1), Item Drop Power: Ice (Lv. 1) |
| Ultra Klawf Claw Sandwich | Klawf Stick, Tomato, Lettuce, Yellow Bell Pepper, Salt, Olive Oil, Wasabi | Encounter Power: Grass (Lv. 2), Catching Power: Ice (Lv. 2), Item Drop Power: Electric (Lv. 1) |
| Master Klawf Claw Sandwich | Klawf Stick, Tomato, Lettuce, Yellow Bell Pepper, Salt, Olive Oil, Wasabi, Spicy Herba Mystica | Title Power: Grass (Lv. 2), Humungo Power: Ice (Lv. 2), Encounter Power: Electric (Lv. 2) |
| Decadent Sandwich | Smoked Fillet, Klawf Stick, Watercress, Basil, Vinegar, Olive Oil, Salt | Exp. Point Power: Ice (Lv. 1), Raid Power: Psychic (Lv. 1), Encounter Power: Dark (Lv. 1) |
| Great Decadent Sandwich | Smoked Fillet, Klawf Stick, Watercress, Basil, Tofu, Vinegar Olive Oil, Salt | Exp. Point Power: Ice (Lv. 2), Encounter Power: Normal (Lv. 1), Catching Power: Dark (Lv. 1) |
| Ultra Decadent Sandwich | Smoked Fillet, Klawf Stick, Watercress, Basil, Tofu, Red Onion, Vinegar, Olive Oil, Salt | Exp. Point Power: Ghost (Lv. 2), Encounter Power: Dark (Lv. 2), Catching Power: Ice (Lv. 1) |
| Master Decadent Sandwich | Smoked Fillet, Klawf Stick, Watercress, Basil, Tofu, Red Onion, Vinegar, Olive Oil, Salt, Spicy Herba Mystica | Title Power: Ghost (Lv. 2), Humungo Power: Dark (Lv. 2), Encounter Power: Ice (Lv. 2) |
| Legendary Bitter Sandwich | Lettuce, Bacon, Bitter Herba Mystica, Pepper | Title Power: Rock (Lv. 2), Exp. Point Power: Ice (Lv. 2), Encounter Power: Grass (Lv. 2) |
| Legendary Salty Sandwich | Lettuce, Bacon, Salty Herba Mystica, Pepper | Title Power: Rock (Lv. 2), Exp. Point Power: Ice (Lv. 2), Encounter Power: Grass (Lv. 2) |
| Legendary Sweet Sandwich | Lettuce, Bacon, Sweet Herba Mystica, Pepper | Title Power: Rock (Lv. 2), Egg Power (Lv. 2), Encounter Power: Grass (Lv. 2) |
| Legendary Sour Sandwich | Lettuce, Bacon, Sour Herba Mystica, Pepper | Title Power: Rock (Lv. 2), Teensy Power: Ice (Lv. 2), Encounter Power: Grass (Lv. 2) |
| Legendary Spicy Sandwich | Lettuce, Bacon, Spicy Herba Mystica, Pepper | Title Power: Rock (Lv. 2), Humungo Power: Ice (Lv. 2), Encounter Power: Grass (Lv. 2) |
| Tropical Sandwich | Klawf Stick, Avocado, Marmalade | Egg Power (Lv. 1), Encounter Power: Fairy (Lv. 1), Catching Power: Dragon (Lv. 1) |
| Great Tropical Sandwich | Klawf Stick, Avocado, Pineapple, Marmalade | Catching Power: Ground (Lv. 2), Encounter Power: Dark (Lv. 1), Item Drop Power: Water (Lv. 1) |
| Ultra Tropical Sandwich | Klawf Stick, Avocado, Pineapple, Jalapeño, Marmalade | Catching Power: Rock (Lv. 2), Item Drop Power: Water (Lv. 2), Encounter Power: Ground (Lv. 1) |
| Master Tropical Sandwich | Klawf Stick, Avocado, Pineapple, Jalapeño, Marmalade, Sour Herba Mystica | Title Power: Rock (Lv. 2), Catching Power: Water (Lv. 2), Item Drop Power: Ground (Lv. 2) |
| Sushi Sandwich | Rice, Smoked Fillet x2, Klawf Stick, Salt, Vinegar, Wasabi | Encounter Power: Dark (Lv. 1), Catching Power: Fighting (Lv. 1), Humungo Power: Normal (Lv. 1) |
Best Natures List + Nature Lady Fortune Teller in Pokémon: Let’s Go, Pikachu & Eevee!

There’s a Fortune Teller lady in Pokémon: Let’s Go, Pikachu! and Pokémon Let’s Go Eevee that offers to tell you the nature of all the Pokémon you will capture in the wild that day.
But you probably already knew this and you’re here for the list of best natures for every Pokémon in the game. In that case, Jump to the list.
This is a game-changer for all the trainers who want their Pokémon to be of a certain nature in order to boost up their best stats according to their individual move set. She will ask for just 10,000 Pokédollars to tell you your fortune, and then you have to choose one flower to water, and one to thin. 
Choosing the appropriate color of the flower to water and thin determines the nature of all the next wild Pokémon you catch that day. But let’s elaborate.
Where can you find the Fortune Teller Nature Lady in Pokémon Let’s Go Pikachu & Eevee?

She is located inside the Pokémon Center in Celadon City. This means it will take a while for you to reach her. You arrive into Celadon some time after you’ve finished about half the main story of the game. Enter the Pokemon Center in Celadon City and you’ll see her and her Abra. Pokemon center in Celadon is in the east part of the city, next to route 7. You’ll reach this city as part of the ghost in Lavender tower story.
Fortune Teller all Flower color combinations
Depending on your choice she foretells that the Pokemon for the day will have a certain nature.

Nature Defines which stats will get a bonus and which stats will get decreased. Color scheme of stats is Red = Attack, Yellow = Defense, Blue = Sp. Attack, Green = Sp. Defense and Pink = Speed. Buff your Pokemon with nature that compliments its moves the best.
Here’s a list of all flower watering and thinning combinations you can choose to get certain nature for your pokemon in Pokemon Let’s Go.
|
Water |
Thin |
Nature |
|
Red (+ ATK) |
Yellow (-DEF) |
Lonely |
|
Red (+ ATK) |
Blue (- Sp. ATK) |
Adamant |
|
Red (+ ATK) |
Red (- ATK) |
Hardy (no stats change) |
|
Red (+ ATK) |
Green (- Sp. DEF) |
Naughty |
|
Red (+ ATK) |
Pink (- SPD) |
Brave |
|
Yellow (+DEF) |
Red (- ATK) |
Bold |
|
Yellow (+DEF) |
Yellow (-DEF) |
Docile (no stats change) |
|
Yellow (+DEF) |
Blue (- Sp. ATK) |
Impish |
|
Yellow (+DEF) |
Green (- Sp. DEF) |
Lax |
|
Yellow (+DEF) |
Pink (- SPD) |
Relaxed |
|
Blue (+ Sp. ATK) |
Red (- ATK) |
Modest |
|
Blue (+ Sp. ATK) |
Yellow (-DEF) |
Mild |
|
Blue (+ Sp. ATK) |
Blue (- Sp. ATK) |
Bashful (no stats change) |
|
Blue (+ Sp. ATK) |
Green (- Sp. DEF) |
Rash |
|
Blue (+ Sp. ATK) |
Pink (- SPD) |
Quiet |
|
Green (+ Sp. DEF) |
Red (- ATK) |
Calm |
|
Green (+ Sp. DEF) |
Yellow (-DEF) |
Gentle |
|
Green (+ Sp. DEF) |
Blue (- Sp. ATK) |
Careful |
|
Green (+ Sp. DEF) |
Green (- Sp. DEF) |
Quirky (no stats change) |
|
Green (+ Sp. DEF) |
Pink (- SPD) |
Sassy |
|
Pink (+ SPD) |
Red (- ATK) |
Timid |
|
Pink (+ SPD) |
Yellow (-DEF) |
Hasty |
|
Pink (+ SPD) |
Blue (- Sp. ATK) |
Jolly |
|
Pink (+ SPD) |
Green (- Sp. DEF) |
Naive |
|
Pink (+ SPD) |
Pink (- SPD) |
Serious (no stats change) |
So now you’re probably wondering what nature is the best for each Pokémon, or if you’ll be able to afford to pick the nature for all your Pokémon…
Well, plan your day, choose a nature for the day, pay the Nature Lady to tell you your chosen fortune, and go catch all the Pokémon that will benefit from having that chosen nature, thus maximizing what you get out of those 10,000 Pokédollars. The effect ends at midnight, so start early.
To help you out with this endeavour, here’s a list of all the Pokémon in the game, sorted by their preferred nature.
|
Pokédex Number |
Pókemon |
Best Nature |
Types |
|
|
23 |
Ekans |
Adamant |
Poison |
|
|
24 |
Arbok |
Adamant |
Poison |
|
|
32 |
Nidoran (♂) |
Adamant |
Poison |
|
|
33 |
Nidorino |
Adamant |
Poison |
|
|
34 |
Nidoking |
Adamant |
Poison |
Ground |
|
56 |
Mankey |
Adamant |
Fighting |
|
|
57 |
Primeape |
Adamant |
Fighting |
|
|
58 |
Growlithe |
Adamant |
Fire |
|
|
59 |
Arcanine |
Adamant |
Fire |
|
|
66 |
Machop |
Adamant |
Fighting |
|
|
67 |
Machoke |
Adamant |
Fighting |
|
|
68 |
Machamp |
Adamant |
Fighting |
|
|
104 |
Cubone |
Adamant |
Ground |
|
|
105 |
Marowak |
Adamant |
Ground |
|
|
107 |
Hitmonchan |
Adamant |
Fighting |
|
|
115 |
Kangaskhan |
Adamant |
Normal |
|
|
129 |
Magikarp |
Adamant |
Water |
|
|
130 |
Gyarados |
Adamant |
Water |
Flying |
|
136 |
Flareon |
Adamant |
Fire |
|
|
74 |
Geodude |
Adamant/Careful |
Rock |
Ground |
|
75 |
Graveler |
Adamant/Careful |
Rock |
Ground |
|
76 |
Golem |
Adamant/Careful |
Rock |
Ground |
|
143 |
Snorlax |
Adamant/Careful |
Normal |
|
|
152 |
Meltan |
Adamant/Careful |
Steel |
|
|
153 |
Melmetal |
Adamant/Careful |
Steel |
|
|
27 |
Sandshrew |
Adamant/Impish |
Ground |
|
|
28 |
Sandslash |
Adamant/Impish |
Ground |
|
|
13 |
Weedle |
Adamant/Jolly |
Bug |
Poison |
|
14 |
Kakuna |
Adamant/Jolly |
Bug |
Poison |
|
15 |
Beedrill |
Adamant/Jolly |
Bug |
Poison |
|
21 |
Spearow |
Adamant/Jolly |
Normal |
Flying |
|
22 |
Fearow |
Adamant/Jolly |
Normal |
Flying |
|
50 |
Diglett |
Adamant/Jolly |
Ground |
|
|
51 |
Dugtrio |
Adamant/Jolly |
Ground |
|
|
84 |
Doduo |
Adamant/Jolly |
Normal |
Flying |
|
85 |
Dodrio |
Adamant/Jolly |
Normal |
Flying |
|
111 |
Rhyhorn |
Adamant/Jolly |
Ground |
Rock |
|
112 |
Rhydon |
Adamant/Jolly |
Ground |
Rock |
|
123 |
Scyther |
Adamant/Jolly |
Bug |
Flying |
|
140 |
Kabuto |
Adamant/Jolly |
Rock |
Water |
|
141 |
Kabutops |
Adamant/Jolly |
Rock |
Water |
|
142 |
Aerodactyl |
Adamant/Jolly |
Rock |
Flying |
|
147 |
Dratini |
Adamant/Jolly |
Dragon |
|
|
148 |
Dragonair |
Adamant/Jolly |
Dragon |
|
|
149 |
Dragonite |
Adamant/Jolly |
Dragon |
Flying |
|
4 |
Charmander |
Adamant/Jolly or Timid/Modest |
Fire |
|
|
5 |
Charmeleon |
Adamant/Jolly or Timid/Modest |
Fire |
|
|
6 |
Charizard |
Adamant/Jolly or Timid/Modest |
Fire |
Flying |
|
90 |
Shellder |
Adamant/Naive |
Water |
|
|
91 |
Cloyster |
Adamant/Naive |
Water |
Ice |
|
98 |
Krabby |
Adamant/Naughty |
Water |
|
|
99 |
Kingler |
Adamant/Naughty |
Water |
|
|
39 |
Jigglypuff |
Bold/Modest |
Fairy |
|
|
40 |
Wigglytuff |
Bold/Modest |
Fairy |
|
|
79 |
Slowpoke |
Bold/Modest |
Water |
Psychic |
|
80 |
Slowbro |
Bold/Modest |
Water |
Psychic |
|
88 |
Grimer |
Brave/Careful |
Poison |
|
|
89 |
Muk |
Brave/Careful |
Poison |
|
|
35 |
Clefairy |
Calm |
Fairy |
|
|
36 |
Clefable |
Calm |
Fairy |
|
|
113 |
Chansey |
Calm |
Normal |
|
|
43 |
Oddish |
Calm/Bold |
Grass |
Poison |
|
44 |
Gloom |
Calm/Bold |
Grass |
Poison |
|
45 |
Vileplume |
Calm/Bold |
Grass |
Poison |
|
1 |
Bulbasaur |
Calm/Modest |
Grass |
Poison |
|
2 |
Ivysaur |
Calm/Modest |
Grass |
Poison |
|
3 |
Venusaur |
Calm/Modest |
Grass |
Poison |
|
134 |
Vaporeon |
Calm/Modest |
Water |
|
|
41 |
Zubat |
Impish |
Poison |
Flying |
|
42 |
Golbat |
Impish |
Poison |
Flying |
|
46 |
Paras |
Impish |
Bug |
Grass |
|
47 |
Parasect |
Impish |
Bug |
Grass |
|
108 |
Lickitung |
Impish |
Normal |
|
|
95 |
Onix |
Impish/Adamant |
Rock |
Ground |
|
16 |
Pidgey |
Jolly |
Normal |
Flying |
|
17 |
Pidgeotto |
Jolly |
Normal |
Flying |
|
18 |
Pidgeot |
Jolly |
Normal |
Flying |
|
19 |
Rattata |
Jolly |
Normal |
|
|
20 |
Raticate |
Jolly |
Normal |
|
|
83 |
Farfetch’d |
Jolly |
Normal |
Flying |
|
127 |
Pinsir |
Jolly |
Bug |
|
|
133 |
Eevee |
Jolly |
Normal |
|
|
52 |
Meowth |
Jolly/Adamant |
Normal |
|
|
53 |
Persian |
Jolly/Adamant |
Normal |
|
|
106 |
Hitmonlee |
Jolly/Adamant |
Fighting |
|
|
128 |
Tauros |
Jolly/Naive/Adamant |
Normal |
|
|
48 |
Venonat |
Jolly/Timid |
Bug |
|
|
49 |
Venomoth |
Jolly/Timid |
Bug |
|
|
126 |
Magmar |
Mild |
Fire |
|
|
118 |
Goldeen |
Mild/Adamant |
Water |
|
|
119 |
Seaking |
Mild/Adamant |
Water |
|
|
7 |
Squirtle |
Modest |
Water |
|
|
8 |
Wartortle |
Modest |
Water |
|
|
9 |
Blastoise |
Modest |
Water |
|
|
29 |
Nidoran (♀) |
Modest |
Poison |
|
|
30 |
Nidorina |
Modest |
Poison |
|
|
31 |
Nidoqueen |
Modest |
Poison |
Ground |
|
69 |
Bellsprout |
Modest |
Grass |
Poison |
|
70 |
Weepinbell |
Modest |
Grass |
Poison |
|
71 |
Victreebel |
Modest |
Grass |
Poison |
|
96 |
Drowzee |
Modest |
Psychic |
|
|
97 |
Hypno |
Modest |
Psychic |
|
|
100 |
Voltorb |
Modest |
Electric |
|
|
101 |
Electrode |
Modest |
Electric |
|
|
102 |
Exeggcute |
Modest |
Grass |
Psychic |
|
103 |
Exeggutor |
Modest |
Grass |
Psychic |
|
109 |
Koffing |
Modest |
Poison |
|
|
110 |
Weezing |
Modest |
Poison |
|
|
114 |
Tangela |
Modest |
Grass |
|
|
116 |
Horsea |
Modest |
Water |
|
|
117 |
Seadra |
Modest |
Water |
|
|
131 |
Lapras |
Modest |
Water |
Ice |
|
60 |
Poliwag |
Modest/Adamant |
Water |
|
|
61 |
Poliwhirl |
Modest/Adamant |
Water |
|
|
62 |
Poliwrath |
Modest/Adamant |
Water |
Fighting |
|
72 |
Tentacool |
Modest/Calm |
Water |
Poison |
|
73 |
Tentacruel |
Modest/Calm |
Water |
Poison |
|
86 |
Seel |
Modest/Calm |
Water |
|
|
87 |
Dewgong |
Modest/Calm |
Water |
Ice |
|
25 |
Pikachu |
Modest/Timid |
Electric |
|
|
26 |
Raichu |
Modest/Timid |
Electric |
|
|
37 |
Vulpix |
Modest/Timid |
Fire |
|
|
38 |
Ninetales |
Modest/Timid |
Fire |
|
|
54 |
Psyduck |
Modest/Timid |
Water |
|
|
55 |
Golduck |
Modest/Timid |
Water |
|
|
63 |
Abra |
Modest/Timid |
Psychic |
|
|
64 |
Kadabra |
Modest/Timid |
Psychic |
|
|
65 |
Alakazam |
Modest/Timid |
Psychic |
|
|
77 |
Ponyta |
Modest/Timid |
Fire |
|
|
78 |
Rapidash |
Modest/Timid |
Fire |
|
|
92 |
Gastly |
Modest/Timid |
Ghost |
Poison |
|
93 |
Haunter |
Modest/Timid |
Ghost |
Poison |
|
94 |
Gengar |
Modest/Timid |
Ghost |
Poison |
|
135 |
Jolteon |
Modest/Timid |
Electric |
|
|
150 |
Mewtwo |
Modest/Timid |
Psychic |
|
|
151 |
Mew |
Modest/Timid |
Psychic |
|
|
132 |
Ditto |
Relaxed |
Normal |
|
|
10 |
Caterpie |
Timid |
Bug |
|
|
11 |
Metapod |
Timid |
Bug |
|
|
12 |
Butterfree |
Timid |
Bug |
Flying |
|
122 |
Mr. Mime |
Timid |
Psychic |
|
|
124 |
Jynx |
Timid |
Ice |
Psychic |
|
125 |
Electabuzz |
Timid |
Electric |
|
|
144 |
Articuno |
Timid |
Ice |
Flying |
|
81 |
Magnemite |
Timid/Modest |
Electric |
Steel |
|
82 |
Magneton |
Timid/Modest |
Electric |
Steel |
|
120 |
Staryu |
Timid/Modest |
Water |
|
|
121 |
Starmie |
Timid/Modest |
Water |
Psychic |
|
137 |
Porygon |
Timid/Modest |
Normal |
|
|
145 |
Zapdos |
Timid/Modest |
Electric |
Flying |
|
146 |
Moltres |
Timid/Modest |
Fire |
Flying |
|
138 |
Omanyte |
Timid/Modest/Bold |
Rock |
Water |
|
139 |
Omastar |
Timid/Modest/Bold |
Rock |
Water |
Anything else I might have forgotten to add? You disagree? Let me know in the comments.
Animal Crossing Switch!

Unless you have been living under a rock, you already know that the best game ever Animal Crossing is coming to the Switch in 2019.
If you’re like me, you’re probably wondering what the title will be, if it is going to be as good as New Leaf, and all the details that we need to know to get even more hyped about it.
I NEED THE DEETS.
Stay tuned! I’m keeping my eyes open in hopes of news about the new best game.
Become Awesome at Salmon Run
I’ve been playing Salmon Run since Splatoon 2 released the mode in 2017. Since then I’ve learned quite a bit about it, I’ve become a Profreshional, and I sometimes struggle to survive due to the inefficacy of my randomly selected teammates when I play freelance. Salmon Run is all about teamwork, and knowing what you’re doing is key to survive the run.
I wrote a Twitter thread a while back to help my friends with their Salmon Run struggles. It got some good feedback back then, but it’s time to give that thread a better and easier to read version, so here is my revision of my Salmon Run tips.
I hope this post will help you and your friends to become awesome Salmon Run players.
Ever noticed your Salmon Run teammates don’t quite know what to do in some situations? Don’t you wish they knew better? This is a thread to help those players survive SR waves. I know there’s an in-game tutorial, but who reads those! 😉 #NintendoSwitch #Splatoon2 #SalmonRun pic.twitter.com/eBH8vZTxmz
— Star ⭐️✨💫💖 (@iStarStuff) June 30, 2018
Before anything else, make sure you know where the egg basket is. This is the first thing you should be aware of before the wave starts. Follow the egg basket, That’s where the action is happening!
Now, in order to succeed at splating the bosses salmonid and getting their eggs to meet your quota, you need to know how to deal with each boss. Each one is different, and the way to splat them is unique to each one of them.
Steel Eel – This long, mechanical beast will chase players relentlessly seeking to encircle and trap them, and splat them. This boss is actually controlled by a single Salmonid at the end of its tail who peddles the steel eel, this is the one you need to shoot and defeat.
Scrapper – This Salmonid drives a mini-armored vehicle around. If enough damage is dealt to its front, it will break down, exposing its open back and preventing it from pivoting, letting you shoot at its driver leading to its quick demise.
 Flyfish – The Flyfish floats around on an inkjet, using two giant coolers to launch Tenta Missiles at players all over the stage. To take it out toss a bomb into each of its two open coolers while the Flyfish prepares to launch its missiles. Also make sure to throw the bomb on the side you’re on, that way other player can toss the other bomb to splat the Flyfish.
Additionally the Grizzco Explosher is the only weapon that can splat a Flyfish, however you only get this weapon in special rotations.
Maws – Maws is the easiest boss to splat. It lurks under the ink, you’ll see a moving bobber that leaves a small ink trail. When in range of a player a green circle will flash before Maws leaps up to devour its target. If you move, it will follow you around until it can circle you, giving you the chance to lure him near the basket for you to get its eggs in the basket quickly. Toss a bomb into its mouth to take it out.
Steelhead – Will launch bombs that it inflates on the top of its head, which explode taking out anyone near the blast. Take care of this boss as soon as possible, as it can wreak havoc and cause you to lose really fast. To take him out shoot at the bomb while it inflates on the Steelhead’s head. Medium & large range weapons are the best for this boss.
Stinger -The Stinger is a tall boss built of stacked pots and pans with a single Salmonid on top shooting a Sting Ray weapon. Shoot it quickly & repeatedly before it can set up its blast! Knock away its pots until it falls to the ground, then take it out. This is another one that should be dealt with as soon as possible, as it will shoot its sting ray across the stage relentlessly.
Drizzler – The Drizzler flies over the stage, then lands using its umbrella-like shield to protect the salmonid inside. It can only be attacked when it exposes itself as it turns over to fire the cannon on top, which releases a deadly Ink Storm. Shoot at it with all you’ve got! The Ink Storm cannon can be neutralized by shooting at it before it explodes.
Mothership Event – Shoot at the flying salmonids before they drop their cargo to get their eggs. Once or twice during the wave the mothership will approach the egg basket to steal eggs back. Shoot the mothership to stop it.
just do it. #salmonrun #Mothership #Splatoon2 #NintendoSwitch pic.twitter.com/Y0SX1NRf98
— 🎵Kellie🎵 (@kellie4music) January 8, 2018
The crew member with the stingray special should shoot at the Mothership to get more eggs.

Goldie Event– Sewers emerge on the stage and light up. When you shoot them, they spew a geyser of ink, and countless Salmonids spawn from it. Start shooting at the sewer farthest from the egg basket, as it is the one most likely to be the one where Goldie is hiding. Find Goldie, follow and shoot it as much as possible to get the eggs.
Glowflies – One crew member is surrounded by Glowflies, all Salmonids will rush toward that player, including the Goldie boss. Group up your team at a strategic point and shoot everything that comes at you. The only way to survive the salmon rush is to stay together. Don’t leave your teammates by themselves.

Low Tide Cannons – Cannons spawn for you to fire at the spawning hordes of Salmonids and bosses. Two teammates should focus on firing the cannons, while the other two collect the eggs. You can also be splatter by Maws, Stingray, or Flyfish while in the canon, so pay attention to the changes in your cannon view and move quickly.

Fog event – It’s just a normal wave with very poor visibility, so you have no idea what’s there until you’re either right in front of it, or it’s already attacking you. Just open your eyes wide, and be careful.
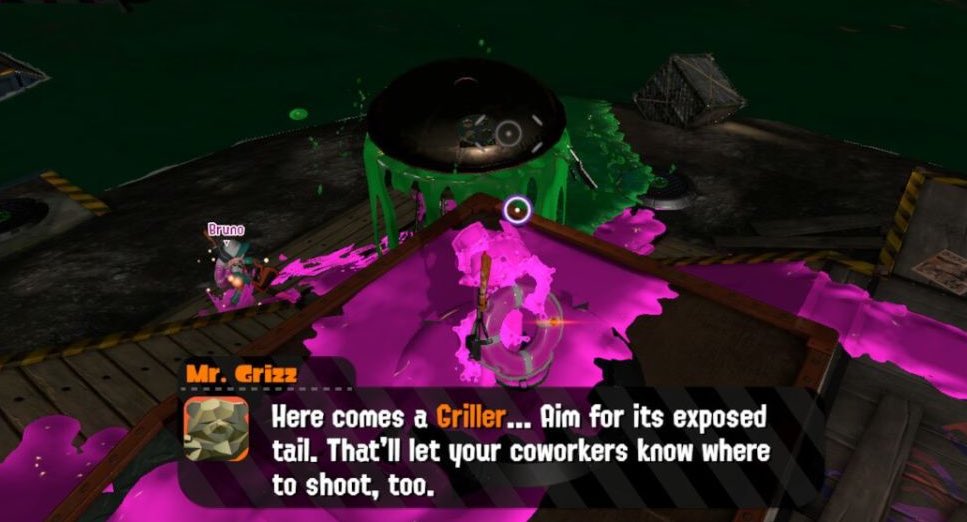
Griller – Grillers target a player with a red laser before they enter the stage. Their weakness is the Salmon at the back of the grill. Shoot at it to expose more that can be shot to kill it. The targeted player must run away from teammates so they can shoot the Griller in the back.
Hold the sliders for your teammates, it can make the difference between succeeding or failing, but also remember to look at the remaining time on your screen, if the egg you’re carrying is the one that will meet the quota, RUN! You need at least four seconds to make to the basket with your egg.
Prioritize reviving your teammates. Remember that if your teammates fail, you fail, too.
Just because you got splatted, doesn’t mean you’re done for. Start making your way towards an ally, preferably near the egg basket. The egg you’re probably carrying may be the difference between meeting your quota and failing a wave.
Don’t be silent. While it’s true that your communication capabilities are very limited, you shouldn’t neglect the options available to you. If you’re down ask for “help”. If you spot incoming bosses, or many eggs to collect use “this way”.
Don’t Forget to use your Special! You’re given a Special with 2 uses, shown by little packs on your helmet. You can’t recharge them, so knowing when to use them is vital, but failing because you were afraid to waste them is even worse.
Always Booyah back. I was only half kidding when I wrote this as the last tip of my thread. It’s been discussed at infinitum that people should focus on the objective instead of caring about the booyah feature, but it really helps uplift everyone’s spirit, reinforces the team comradery, and makes the run even more fun!